TL;DR:
- Pre-treatment washing involves applying specific chemical solutions to surfaces before pressure cleaning, ensuring deeper, longer-lasting results. Skipping or rushing this step often leads to ineffective cleaning, surface damage, and quicker stain recurrence. Professional crews use tailored chemicals, precise timing, and surface assessment to optimize exterior home maintenance and durability.
Most homeowners assume pressure washing is simple: point a high-pressure stream at a dirty surface and watch the grime vanish. But what is pre-treatment washing, and why do professional crews treat it as the most important step in the entire process? Skipping it is exactly why so many DIY pressure washing jobs leave behind stubborn mold stains, streaky siding, or worse, damaged surfaces. Pre-treatment washing is the targeted chemical step applied before any rinsing begins, and understanding it is the difference between a clean that lasts and one that fades in a few weeks.
Table of Contents
- What is pre-treatment washing in exterior home cleaning?
- How pre-treatment washing works: the chemistry and timing
- Types of stains and how pre-treatment targets them
- Common pitfalls and expert tips for effective pre-treatment washing
- How professional pre-treatment washing fits into your home’s exterior maintenance
- Why many homeowners underestimate the power of pre-treatment washing
- How White Diamond Pressure Washing ensures expert pre-treatment washing for your Citrus County home
- Frequently asked questions
Key Takeaways
| Point | Details |
|---|---|
| Pre-treatment definition | Pre-treatment washing prepares your home’s exterior by loosening stains and dirt before pressure washing. |
| Dwell time importance | Allow pretreatment chemicals to sit 5-10 minutes without drying for effective stain removal. |
| Targeted chemical use | Use specific chemicals matched to stain type to avoid damage and improve results. |
| Avoid common mistakes | Prevent issues by controlling dwell time, pressure settings, and rinsing techniques. |
| Professional advantage | Experts ensure safe, effective pre-treatment that protects your home and enhances cleaning. |
What is pre-treatment washing in exterior home cleaning?
Pre-treatment washing means applying a chemical solution directly to your home’s exterior surfaces before the main rinse or pressure wash begins. Think of it the way a good dry cleaner treats a wine stain before running a garment through the cleaning cycle. As one laundry resource notes, pre-treatment is a targeted step applied before the main wash cycle to lift specific stains and prevent them from setting. The same logic governs your home’s siding, driveway, and roof.
The concept carries directly from the pre-treatment laundry process into exterior cleaning. You are not just blasting water at a surface. You are giving chemistry time to do the heavy lifting first. This is why pre-treatment for exterior cleaning consistently delivers results that pressure washing alone cannot match.
Here is what the pre-treatment step actually involves:
- Surface inspection: Identifying stain types, surface material, and any fragile areas before selecting a chemical.
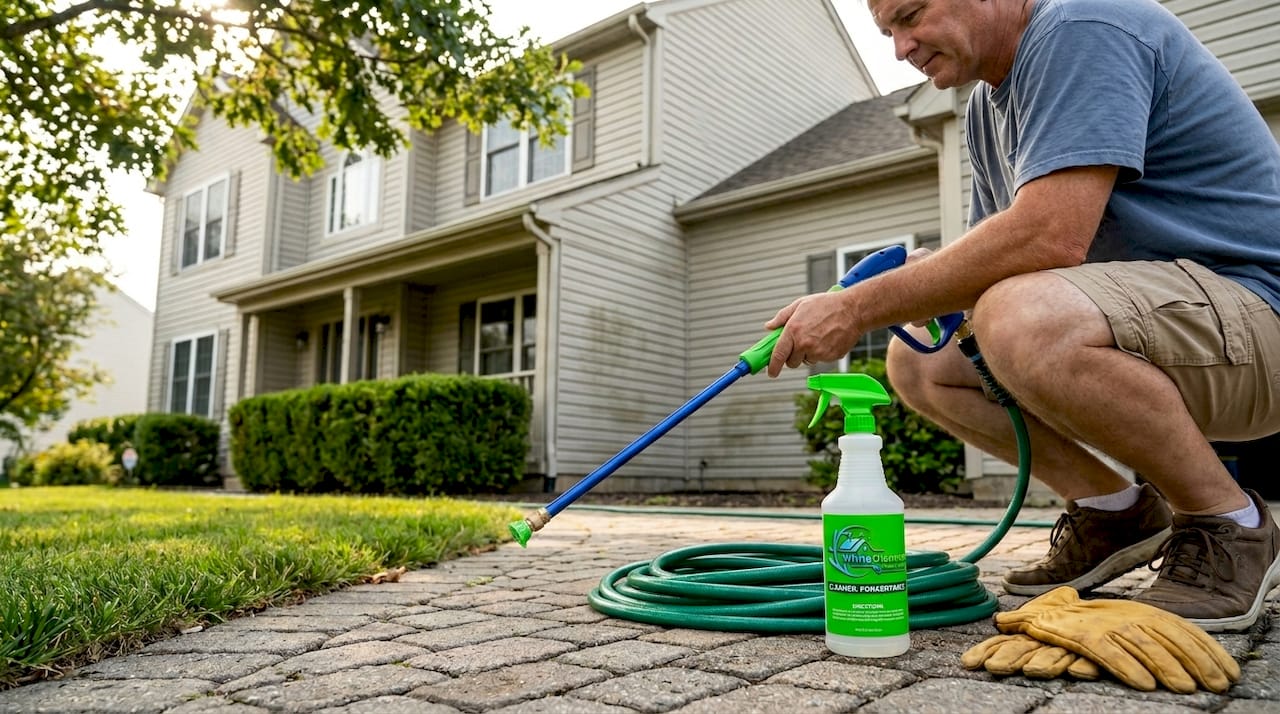
- Chemical application: Spraying or brushing a specialized solution onto the target area at the right dilution.
- Dwell period: Allowing the solution to sit and break down organic growth, oils, or mineral deposits.
- Rinse or pressure wash: Removing the loosened contaminants with the appropriate water pressure for the surface.
Different chemicals serve completely different purposes. A sodium hypochlorite-based solution kills mold and mildew at the cellular level. An alkaline degreaser emulsifies oil and grease. A tannin-neutralizing agent targets rust-colored stains from leaves, bark, or iron in well water. Using the wrong one is not just ineffective. It can strip paint, bleach wood, or etch concrete.
How pre-treatment washing works: the chemistry and timing
Understanding what pre-treatment washing does leads naturally to understanding how it works. The chemistry is straightforward, but the timing is where most people go wrong.
When a pretreatment solution contacts a stained surface, it begins a chemical reaction with the contaminant. For mold and algae, oxidizing agents rupture cell walls. For grease, surfactants surround oil molecules and lift them away from the surface. Neither reaction happens instantly. The solution needs time on the surface to complete its work. Dwell time typically runs 5 to 10 minutes and the solution should not be allowed to dry on surfaces.
That last part matters more than most people realize. A dried pretreatment solution leaves chemical residue that can streak, attract more dirt, or cause surface discoloration. On a sunny Florida afternoon in Citrus County, a solution applied to a hot concrete driveway can dry in under three minutes if the technician is not careful.
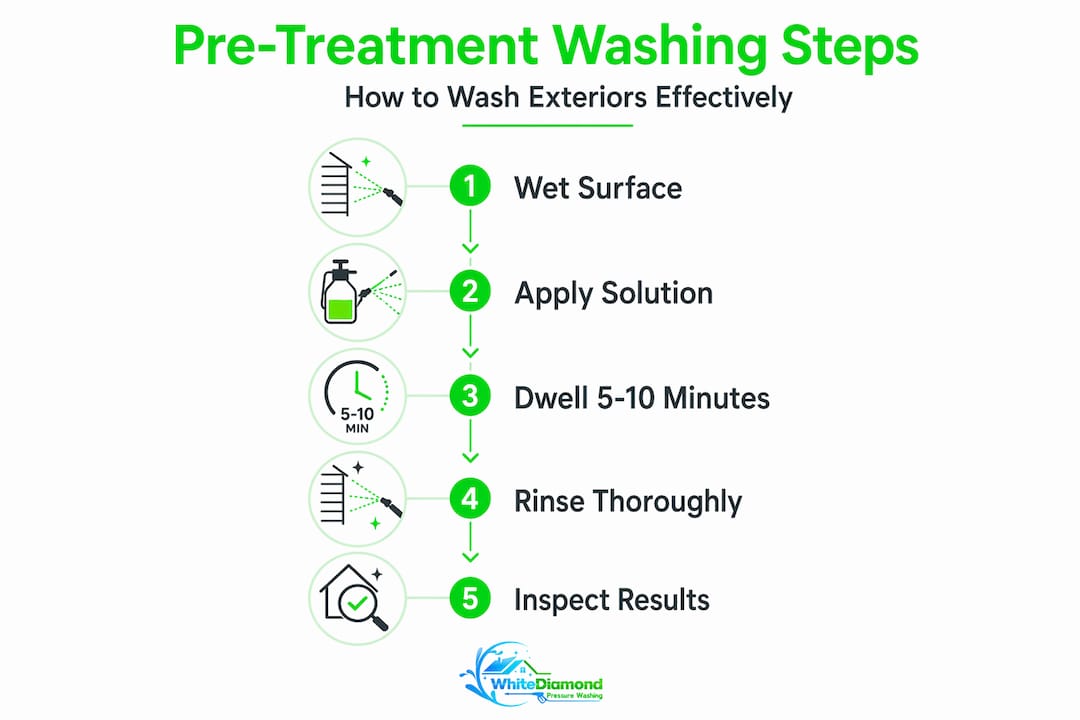
Here is how the sequence should unfold every time:
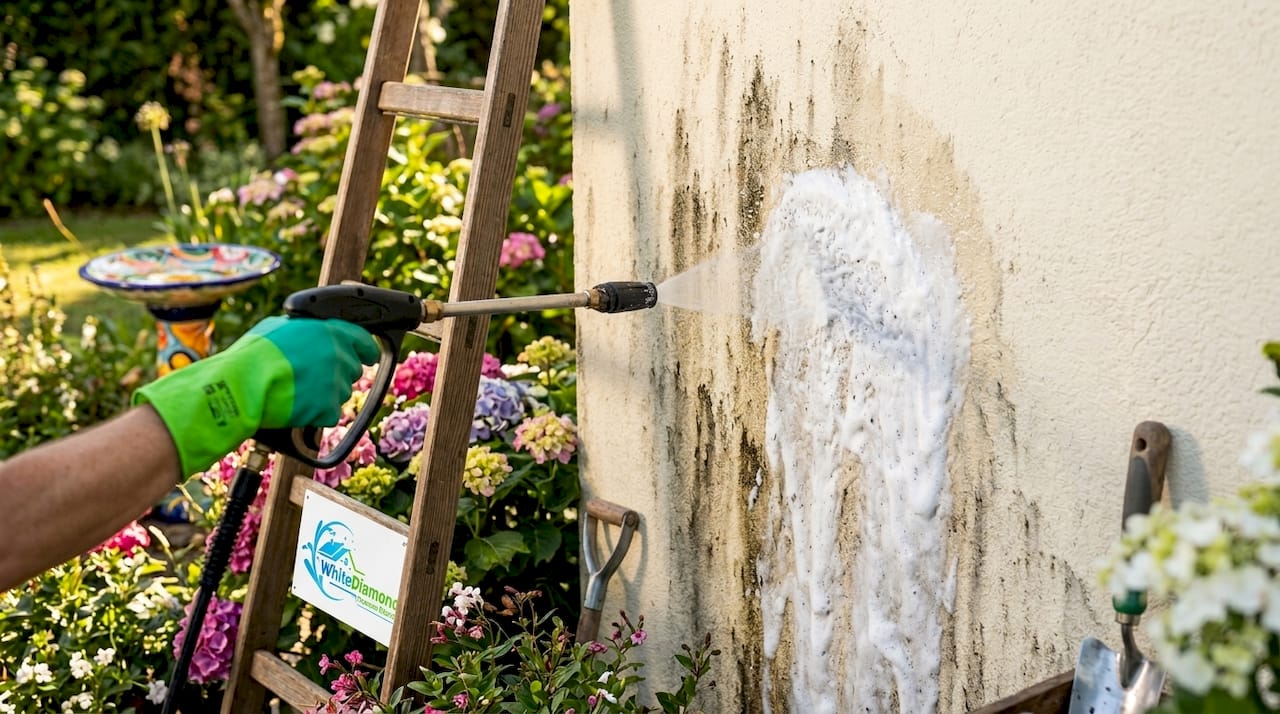
- Apply the chemical solution evenly across the target surface, working in manageable sections rather than treating an entire wall at once.
- Monitor the dwell time actively, not by walking away, but by watching the surface for the chemical’s visual cues, like foaming on mold or color change on algae.
- Agitate if needed using a soft brush on textured surfaces to help the chemical penetrate deeper into grout lines, wood grain, or porous brick.
- Rinse thoroughly before the solution dries, starting from the top of the surface and working downward so loosened material does not run over already-cleaned areas.
“The dwell time is not a break in the job. It is the job. What happens in those minutes determines everything about the final result.” — White Diamond Pressure Washing field technician
Pro Tip: On hot days or direct sunlight, wet the surface lightly with plain water before applying pretreatment. This slows evaporation and gives the chemical the full dwell time it needs without drying out prematurely.
Skipping or rushing this step is one of the most documented pressure washing mistakes to avoid, and it accounts for a large share of the re-cleaning calls professionals receive.
Types of stains and how pre-treatment targets them
With the chemistry and timing understood, it is worth getting specific about which stains require which approach. Florida homes in Citrus County face a particular combination of humidity, organic debris, and hard well water that creates a layered stain problem unlike what you see in drier climates.
Pre-treatment matched to stain type and surface ensures targeted cleaning without causing collateral damage to paint, caulk, or wood grain. A one-chemical-fits-all approach is not just lazy, it is genuinely risky.
| Stain type | Common examples | Recommended pretreatment |
|---|---|---|
| Mold and mildew | Black streaks on siding, green roof stains | Sodium hypochlorite (bleach-based) solution |
| Algae | Green film on driveways, pool decks | Oxidizing algaecide, low concentration |
| Oil and grease | Driveway tire marks, garage floor stains | Alkaline degreaser or citrus-based emulsifier |
| Tannin stains | Rust-colored marks from leaves, bark, well water | Tannin-neutralizing acid wash |
| Efflorescence | White chalky powder on brick or concrete | Mild acid solution (diluted muriatic or phosphoric) |
Key considerations when choosing a pretreatment approach:
- Surface compatibility matters as much as stain type. A bleach solution that works perfectly on vinyl siding can bleach and weaken a cedar wood fence.
- Concentration levels are not one-size-fits-all. The same chemical used at different dilutions produces very different results and risk levels.
- Layered stains need layered treatment. A driveway with both oil stains and algae growth may require a degreaser applied first, followed by a separate oxidizing treatment.
For a deeper look at matching solutions to specific exterior surfaces, the stain removal guide for outdoor surfaces covers material-specific approaches in detail.
Common pitfalls and expert tips for effective pre-treatment washing
Now that you know what works, understanding what goes wrong is just as valuable. Homeowners and DIY crews who don’t control dwell time risk reduced effectiveness and streaking, two outcomes that often require a second full cleaning to fix.
The most common mistakes that undercut pre-treatment washing results:
- Letting the solution dry. In direct sun or on heat-absorbing dark surfaces, solutions can dry before the dwell window closes, leaving streaks and chemical residue.
- Wrong nozzle angle on the rinse. Holding a pressure washer nozzle perpendicular to siding and using too much pressure can force water behind panels, leading to moisture damage and mold growth inside the wall cavity.
- Misidentifying the stain. Treating algae with a degreaser accomplishes nothing. Treating oil stains with a bleach solution leaves the oil exactly where it was and introduces unnecessary chemical exposure to surrounding landscaping.
- Skipping the top-to-bottom rinse. Rinsing from the bottom up pushes loosened grime onto already-cleaned sections, creating new streaking and requiring additional passes.
- Using consumer-grade chemicals. Many store-bought products are heavily diluted and designed for light indoor fabrics. Exterior concrete, brick, and wood require commercial-grade formulations with the right surfactant packages.
Pro Tip: Always test your pretreatment solution on a small, inconspicuous area of the surface before applying it broadly. This is especially important on painted wood, colored concrete, or older siding where fading or discoloration could occur.
For homeowners in Citrus County considering a DIY attempt, reviewing pressure washing safety protocols before handling any chemical solutions is a strong first move.
How professional pre-treatment washing fits into your home’s exterior maintenance
Understanding the process and avoiding mistakes leads directly to the bigger picture: how pre-treatment washing benefits your home over time, not just on cleaning day.
Florida’s climate accelerates exterior surface degradation faster than most other states. Mold, algae, and chalky efflorescence are not just cosmetic problems. They actively break down paint binders, compromise wood fibers, and cause concrete to spall over time. Pressure washing removes contaminants that degrade surfaces, improve paint adhesion, and prevent structural decay. Pre-treatment makes that wash far more thorough.
Benefits of incorporating pre-treatment washing into your regular home maintenance routine:
- Paint lasts longer. Removing mold and chalky residue before repainting ensures proper adhesion. Paint applied over organic growth or efflorescence fails within months.
- Surfaces degrade more slowly. Regular removal of biological growth prevents the acids mold and algae produce from etching into concrete, brick, and wood.
- Hidden damage gets caught early. A thorough pre-treatment and wash often reveals cracked caulk, failing sealants, or soft wood that would otherwise go unnoticed until it becomes a costly repair.
- Cleaning intervals extend. A surface properly pre-treated and washed stays cleaner longer because the chemical treatment kills organic growth at the root, not just at the surface.
| Maintenance factor | Without pre-treatment washing | With professional pre-treatment washing |
|---|---|---|
| Exterior paint lifespan | 4 to 6 years before repainting | 7 to 10 years with regular cleaning |
| Mold and algae return time | 3 to 6 months | 12 to 18 months |
| Surface damage risk | Higher, especially on wood and painted surfaces | Lower, due to targeted chemical use |
| Cost over 10 years | Higher from repeat jobs and early repainting | Lower through preventive maintenance |
For pressure washing in maintenance programs, pre-treatment is not optional. It is the foundation.
Why many homeowners underestimate the power of pre-treatment washing
Here is an observation worth sitting with: most homeowners who skip pre-treatment washing are not being careless. They simply cannot see what they are missing. The chemical step happens before the visual transformation, so it feels like an extra expense rather than the actual mechanism behind the result.
We see this pattern constantly. A homeowner watches a crew spend twenty minutes applying solution before even picking up a pressure washer, and their instinct is that this is unnecessary padding in the job. Then they hire a cheaper crew who skips it, the mold comes back in four months instead of eighteen, and now they are paying for the same job twice.
Pretreatment is the chemistry window. Missing it often causes cleaning failures and surface damage that no amount of water pressure can compensate for. Professionals who truly understand the pre-treatment laundry process parallel know that the dwell phase is where the work happens. The rinse is just the reveal.
The subtlety professional crews bring is not just in knowing which chemical to use. It is in reading a surface, estimating its temperature and porosity, adjusting dilution on the fly, and knowing when to stop and reassess rather than push through. That judgment does not come from a YouTube video. It comes from repeated exposure to the specific surfaces, stains, and climate conditions of places like Citrus County, where humidity, oak tannins, and algae create combinations most national guides never address.
Pro Tip: View pre-treatment as an investment in interval length, not just in results. A job done right with proper pretreatment typically lasts three to four times longer than a wash-only job. That math pays for the professional service fee several times over.
Recognizing pressure washing mistakes to avoid starts with understanding that the pre-treatment step is where most errors originate, not during the rinse.
How White Diamond Pressure Washing ensures expert pre-treatment washing for your Citrus County home
You now understand why pre-treatment washing is foundational, not optional. Putting that knowledge into practice for your own home is where White Diamond Pressure Washing comes in.

White Diamond’s technicians are trained specifically for the stain profiles and surface conditions common to Citrus County homes. They arrive with the right chemical formulations for mold, algae, tannins, and efflorescence, and they manage dwell times precisely based on surface temperature, material type, and stain severity. No guesswork. No one-size-fits-all spraying. Every job starts with a proper surface assessment before a single drop of chemical is applied. Their pre-treatment exterior cleaning services are designed to protect your investment and extend the life of your home’s surfaces, not just make them look clean for a few weeks. If you want exterior cleaning that actually lasts, handled by a crew that understands pressure washing safety tips and proper chemical use, get your free estimate today.
Frequently asked questions
What is pre-treatment washing and why is it important?
Pre-treatment washing is applying chemical solutions to loosen stubborn dirt and stains before pressure washing, ensuring a deeper and longer-lasting clean. As one source confirms, it is a targeted step applied before the main wash to lift specific stains and prevent setting.
How long should the pretreatment solution dwell on exterior surfaces?
The solution should sit for 5 to 10 minutes without drying to effectively break down stains and organic growth before rinsing begins.
Can I use one chemical for all types of exterior stains?
No. Mold, oil, and tannin stains each require specific chemicals matched to both the stain type and the surface material. A single chemical approach is frequently ineffective and can cause surface damage.
What common mistakes should I avoid when doing pre-treatment washing?
Avoid letting chemicals dry on surfaces, using the wrong products for specific stains, applying incorrect water pressure, and rinsing from bottom to top. Not controlling dwell time reduces effectiveness and risks streaking or surface damage.
Why should I hire a professional for pre-treatment washing?
Professionals bring precise chemical knowledge, surface-reading experience, and proper equipment that prevents damage while maximizing results. Done right, pretreatment prevents cleaning failure and structural damage, saving you significantly more than the service cost over time.
Recommended
- Pre-treatment for exterior cleaning: boost curb appeal – white-diamond-pressure
- Pre-Paint Washing: Boost Paint Life 30% in 2026 – white-diamond-pressure
- Soft Washing Process Explained: A Step-by-Step Guide for Safety – white-diamond-pressure
- Safe and effective non-abrasive washing for homeowners – white-diamond-pressure