

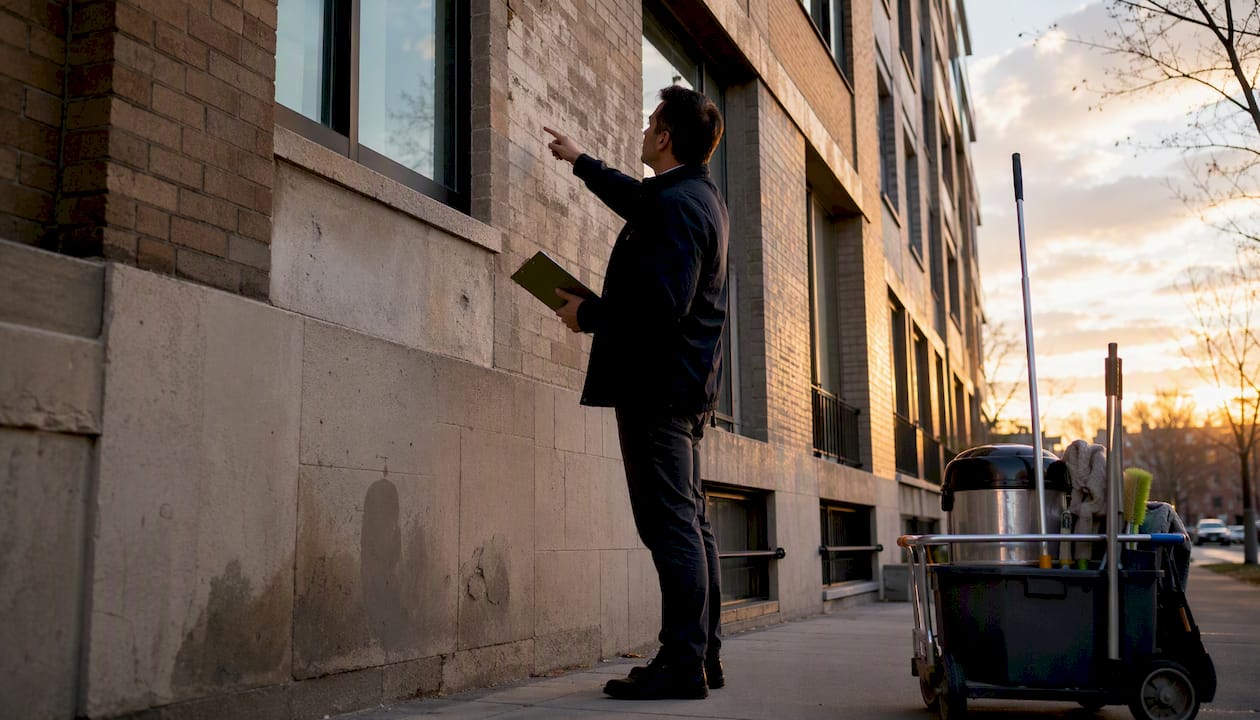
A short, repeatable cycle keeps building facades safe and affordable to manage: inspect, clean, repair, and record. Run that cycle consistently and you prevent unsafe conditions, satisfy regulatory requirements, and avoid the capital rehabilitation projects that follow years of deferred attention. Neglect it and you are looking at falling masonry, water intrusion behind cladding, and repair bills that dwarf what routine upkeep would have cost.
Three things to do this week:
- Safety triage. Walk the perimeter and look up. Any visible spalling, displaced cladding, or cracked sealant near occupied areas needs a temporary barrier and a call to a qualified professional, not a note on next quarter’s agenda.
- Schedule a formal inspection if one is overdue. A licensed architect or engineer should lead or oversee it, and the report should follow ASTM E2270 inspection categories.
- Clear drainage. Check gutters, scuppers, and weep holes now. Blocked drainage is the single most common source of hidden water migration behind cladding.
Whitediamondpressurewashing supports the cleaning step of this cycle with soft-washing and low-pressure techniques that remove biological growth, pollutants, and staining without damaging the underlying material.
Key Takeaways
Consistent inspection, material-appropriate cleaning, timely repair, and centralized records are the four practices that prevent facade emergencies and reduce long-term capital cost.
| Point | Details |
|---|---|
| Inspect on a documented schedule | Follow ASTM E2270 categories; use a licensed architect or engineer for formal reports every 5 years or per local ordinance. |
| Clean before you inspect | A clean surface reveals cracks, failed sealant, and staining patterns that biological growth conceals. |
| Triage by safety grade | Unsafe conditions require same-day isolation and professional contact; scheduled repairs follow for lower-severity findings. |
| Keep a searchable service history | Store drawings, reports, photos, and invoices by zone ID so recurring failures are traceable and capital forecasts are defensible. |
| Whitediamondpressurewashing | Provides soft-washing and low-pressure cleaning with before-and-after photo documentation to support compliance and inspection readiness. |
Table of Contents
- Why proactive facade maintenance protects your building and your budget
- What materials are used for facades, and how long do they last?
- How to spot facade problems before they become emergencies
- A practical maintenance checklist grouped by frequency
- Inspections: who should do them, what standard applies, and what technology helps
- How to clean building exteriors without damaging the facade
- Repair approaches from quick field fixes to planned capital work
- Record-keeping: what to store and how to use it
- How to choose the right facade specialists
- Whitediamondpressurewashing’s approach to safe facade cleaning
- What consistent inspection and record-keeping actually prevents
- Whitediamondpressurewashing supports your facade cleaning program
- Sources
Why proactive facade maintenance protects your building and your budget
The math on facade maintenance is straightforward: a few thousand dollars in annual upkeep versus a six- or seven-figure rehabilitation when deterioration reaches the structural layer. Deferred maintenance turns routine repairs into capital projects, and capital projects require access scaffolding, engineered repair designs, and extended timelines that compound cost at every step.
The safety dimension is more immediate. Loose masonry or displaced cladding panels over a sidewalk are a public liability, not just a maintenance item. Cities have responded with mandatory programs. New York City’s Facade Inspection & Safety Program (FISP), commonly called Local Law 11, requires buildings six stories and taller to undergo periodic inspections and file reports with the Department of Buildings. San Francisco’s Chapter 4E program ties inspection and reporting obligations directly to ASTM E2270 procedures and requires owners to submit mitigation plans within 72 hours of notification for unsafe conditions.
Even where no local ordinance applies, insurers and lenders increasingly ask for documented inspection histories. A proactive program delivers:
- Longer material service life through early intervention
- Fewer emergency repairs and unplanned capital draws
- Documented compliance evidence for regulators, insurers, and lenders
- Improved tenant confidence and reduced liability exposure
What materials are used for facades, and how long do they last?
Lifespans vary widely by material, exposure, and local climate. The table below gives realistic planning ranges; treat them as starting points, not guarantees.
Freeze-thaw cycles accelerate deterioration in masonry and concrete wherever temperatures cross the freezing point repeatedly through winter. Coastal salt environments drive corrosion at metal fasteners and accelerate sealant breakdown, and both conditions shorten the intervals above.
Pro Tip: If your building sits within a mile of the coast or in a climate with frequent freeze-thaw cycles, shorten your repointing and resealing intervals significantly and add a post-winter inspection to your annual calendar.
How to spot facade problems before they become emergencies
Prioritize anything that threatens public safety first. Everything else follows a scheduled repair path. That distinction drives the triage framework from ASTM E2270, which sorts findings into three categories: Unsafe, Requires Repair or Stabilization, and Ordinary Maintenance.
Common warning signs and what they usually indicate:
- Water stains or efflorescence on masonry surfaces signal water moving through the wall, often through failed joints or cracks. The stain is the symptom; the entry point is usually higher up.
- Cracking in concrete or stucco can be cosmetic (surface shrinkage) or structural (movement, settlement, rebar corrosion). Width, pattern, and location determine severity.
- Spalling (chunks of concrete or masonry breaking away) often means embedded rebar has corroded and expanded. Any spall over a pedestrian area is an immediate safety concern.
- Loose or displaced units in brick, terra-cotta, or cladding panels require immediate isolation of the area below and contact with a qualified professional.
- Failed sealant at window perimeters, expansion joints, or panel laps is the most common water-entry pathway and the cheapest fix when caught early.
- Biological growth (algae, moss, lichen) retains moisture against the substrate and accelerates surface erosion, particularly on porous stone and stucco.
For any finding that grades as Unsafe: isolate the area with barriers, apply temporary stabilization if safe to do so, and contact a licensed architect or engineer the same day. Do not wait for a scheduled inspection cycle.
Pro Tip: When documenting damage, photograph from three angles: a wide shot showing location on the building, a mid-range shot showing the defect in context, and a close-up. Record the date, elevation (north/south/east/west), floor level, and approximate dimensions in the file name or metadata. That information is what makes photos useful in a repair specification.
A practical maintenance checklist grouped by frequency
Schedule monthly quick checks, seasonal maintenance, annual cleaning and verification, and specialist reviews every three to five years. The Rimkus facade maintenance guide and BOMA KC best practices both recommend beginning detailed inspections roughly ten years after construction, then on a five-year schedule thereafter, adjusted for complexity and height.
Monthly and seasonal tasks (in-house staff):
- Clear gutters, scuppers, and weep holes before and after the wet season
- Visually scan accessible sealant at ground-floor windows and entry surrounds
- Check roof-edge overflows and confirm drains are unobstructed
- Spot-clean biological growth or staining before it bonds to the substrate
- Document any new cracking, staining, or displaced material with dated photos
Annual tasks (in-house with specialist support):
- Full exterior wash adapted to material type (see cleaning section below)
- Reseal critical joints at window perimeters and expansion joints as needed
- Test roof drainage connections and verify flashing at roof-to-facade transitions
- Review prior inspection findings and confirm scheduled repairs were completed
Three-to-five year tasks (specialist required):
- Masonry repointing where mortar has eroded more than ¼ inch
- Curtain wall reseal and gasket inspection
- Coating or paint replacement on stucco and metal panels
- Formal facade inspection per ASTM E2270 with written report
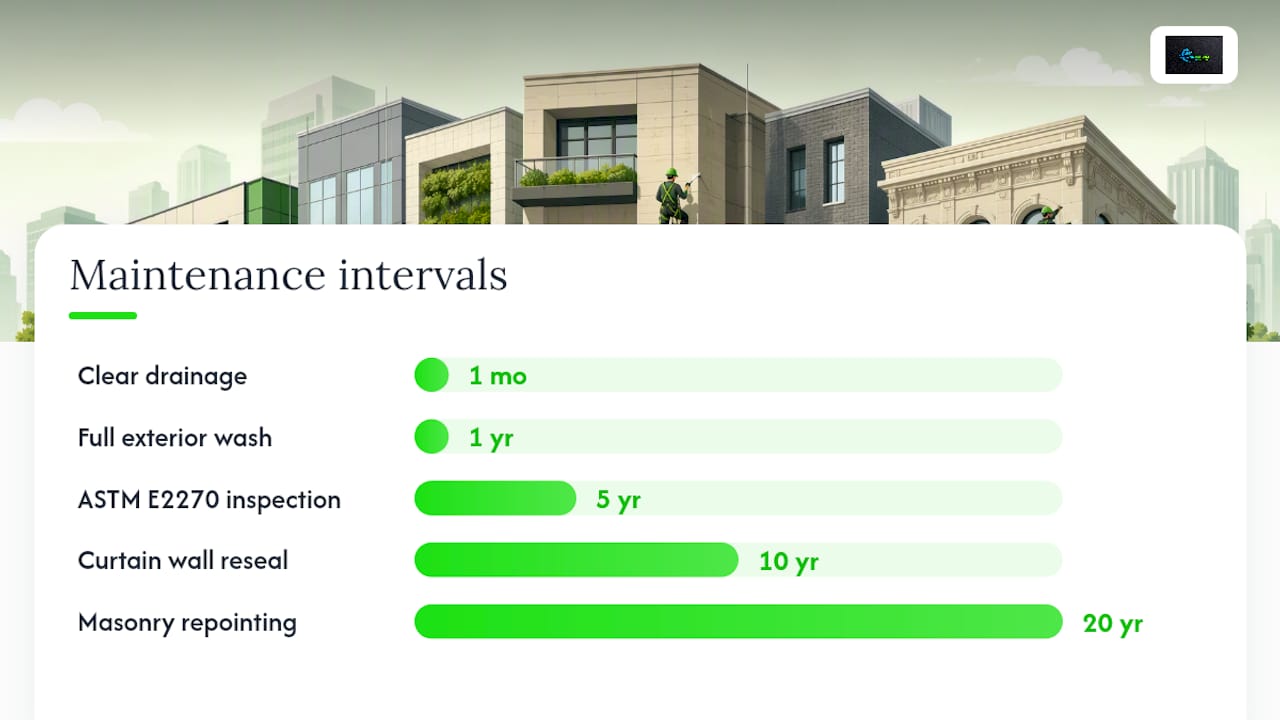
| Task | Frequency | Who Performs | Priority Driver |
|---|---|---|---|
| Clear drainage (gutters, weep holes) | Monthly / seasonal | In-house | Water intrusion prevention |
| Visual perimeter scan | Monthly | In-house | Safety triage |
| Full exterior wash | Annual | Specialist | Material preservation |
| Joint reseal (windows, expansion) | Annual or as needed | Specialist | Water entry prevention |
| Formal ASTM E2270 inspection | Every 5 years (or per ordinance) | Licensed A/E | Compliance, safety |
| Masonry repointing | Every 20 years | Specialist | Structural integrity |
| Curtain wall reseal | Every 10 years | Specialist | Water and air infiltration |
A seasonal exterior maintenance checklist can help property teams assign task ownership and build these items into annual budgets.
Inspections: who should do them, what standard applies, and what technology helps
Inspections must be performed or overseen by qualified professionals and documented in a service history consistent with ASTM E2270 practices. The standard establishes minimum procedures for identifying unsafe conditions, categorizing findings, and guiding repair prioritization. It also requires the inspector to review the building’s facade service history before beginning fieldwork, which is one practical reason to keep that history current.
Who qualifies: A licensed architect or structural engineer should oversee formal inspections. Some jurisdictions accept trained facade inspectors under professional oversight. When commissioning an inspection, ask for the inspector’s license number, their experience with your specific material type, and a sample report from a comparable building.
Access and technology options:
- Drone photogrammetry produces high-resolution imagery of upper elevations quickly and cost-effectively. It is best used for initial surveys and trend documentation between full inspections.
- Thermal / infrared imaging detects concealed moisture behind cladding and insulation voids that visual inspection misses. Particularly useful on curtain wall and stucco buildings.
- Boom lifts and swing stages provide direct hands-on access for sounding (tapping) masonry and testing sealant adhesion. Required for any formal condition assessment.
- Rope access is efficient on mid-rise buildings where swing stages are impractical and boom lifts cannot reach.
Thermal imaging and drone photogrammetry are now standard tools for large-scale facade documentation, enabling efficient surveys that would take weeks by traditional means.
| Access Method | Best For | Limitation |
|---|---|---|
| Drone | Upper elevations, initial survey | Cannot sound masonry or test sealant |
| Thermal / IR | Concealed moisture, insulation voids | Requires temperature differential to work |
| Boom lift | Low-to-mid floors, direct testing | Limited by site access and height |
| Swing stage | Full-height access, high-rise | High mobilization cost |
| Rope access | Mid-rise, targeted areas | Requires certified technicians |
For regulatory timelines: San Francisco’s program requires mitigation plans within 72 hours of an unsafe-condition notification. NYC FISP sets its own filing windows tied to inspection cycle dates. Check your local ordinance for the specific deadlines that apply to your building.
How to clean building exteriors without damaging the facade
Prefer soft washing, low-pressure application, and material-appropriate detergents. Spot-test any chemical on an inconspicuous area before full-scale application. That sequence protects the substrate and gives you a chance to catch adverse reactions before they cover an entire elevation.
Material-specific guidance:
- Brick and concrete: Low-pressure rinse (under 1,500 PSI) with a pH-neutral or mildly alkaline detergent removes most biological growth and pollutant deposits without eroding mortar joints.
- Stone, terra-cotta, and marble: These materials are sensitive to acid and high pressure. Use dilute, pH-neutral cleaners and rinse thoroughly. Avoid muriatic acid on polished or glazed surfaces.
- Painted surfaces and fiber cement: Soft washing with a low-concentration biocide solution is the standard approach. High pressure strips paint and forces water behind panels.
- Metal panels and curtain wall: Mild detergent and low-pressure rinse. Avoid abrasive pads and alkaline cleaners that strip protective coatings.
- Stucco: Soft wash only. High pressure causes delamination and forces water into hairline cracks that are invisible until the wall is wet.
Pro Tip: Schedule cleaning before a formal inspection, not after. A freshly cleaned surface reveals hairline cracks, failed sealant, and staining patterns that are obscured by biological growth and surface dirt. Your inspector will produce a more accurate report on a clean wall.
Environmental and safety requirements apply in most jurisdictions. Runoff containing detergents or biocides may require containment and proper disposal. Check local stormwater permits before any large-scale chemical cleaning. Protect landscaping, adjacent finishes, and window seals with plastic sheeting before applying any cleaning agent.
Bullet checklist for cleaning contractors:
- Confirm proposed pressure settings in PSI for each surface type
- Require a written method statement before work begins
- Verify detergent pH and concentration are appropriate for the substrate
- Confirm runoff containment plan meets local stormwater requirements
- Request before-and-after photos as part of the contract deliverable
Repair approaches from quick field fixes to planned capital work
Triage first, diagnose second, then plan permanent repairs. Temporary stabilization of an unsafe element is not a repair; it buys time to commission a proper diagnosis and design. Treating a temporary fix as permanent is one of the most common and costly mistakes in facade management.
-
Sealant replacement. The most frequent and cost-effective repair. Failed sealant at window perimeters and expansion joints should be removed completely, the joint cleaned and primed, and new sealant applied per the manufacturer’s specification. Partial “cap” applications over old sealant fail quickly.
-
Masonry repointing. Rake out deteriorated mortar to a minimum depth of ¾ inch before applying new mortar matched to the original in composition and hardness. Harder mortar than the surrounding masonry causes spalling.
-
Concrete spall repair. Remove all delaminated concrete, treat exposed rebar for corrosion, apply a bonding agent, and patch with a compatible repair mortar. Structural spalls require an engineer’s assessment before patching.
-
Epoxy injection for cracks. Structural concrete cracks can be stabilized with low-viscosity epoxy injection under controlled pressure. This is a specialist repair; improper injection pressure can widen the crack.
-
Anchorage replacement or retrofit. Loose cladding panels or terra-cotta units with failed anchors require engineered anchorage solutions. Do not re-adhere loose units with caulk; the underlying anchor failure will recur.
-
Waterproofing membrane application. Concrete and masonry walls that show persistent water intrusion after joint repair may need a breathable waterproofing treatment. Avoid vapor-impermeable coatings on masonry; they trap moisture and accelerate spalling.
Pro Tip: Get a written repair specification before any contractor begins capital work. The spec should name the products, application rates, surface preparation standards (SSPC or ICRI grades), and QC testing requirements. A contractor who resists a written spec is a contractor who plans to improvise.
Budgeting guidance: Routine maintenance (cleaning, sealant, minor repointing) typically runs a fraction of the cost of major recladding or full waterproofing rehabilitation. Access method drives cost as much as material does; a swing-stage mobilization for a high-rise adds significant cost to even a small repair area. Budget access separately and batch repairs to minimize mobilization trips.
Third-party quality assurance testing (pull tests for sealant adhesion, core samples for concrete repair) is worth requiring on any capital repair contract. Warranty expectations for sealant work typically run 5–10 years; for structural concrete repairs, 10–20 years depending on the system.
Record-keeping: what to store and how to use it
Centralize construction drawings, warranties, inspection reports, photos, and repair invoices in a dated, searchable system. The SGH facade inspection topic brief recommends maintaining this service history as a prerequisite for accurate diagnosis and lifecycle planning. An inspector who cannot review prior reports is working blind.
Minimum fields for each record entry:
- Date of inspection or repair
- Inspector or contractor name and license number
- Elevation and location (use a grid reference or zone ID)
- Component inspected or repaired
- Findings and severity grade (Unsafe / Requires Repair / Ordinary Maintenance)
- Recommended action and target completion date
- Actual completion date and contractor
- Cost
- Photo file references
Pro Tip: Assign a unique asset ID to each facade zone (e.g., N-03 for the third bay on the north elevation) and use it consistently across all records. When you pull the history for a recurring leak, every related inspection, repair, and photo is immediately findable. Without zone IDs, you are searching through hundreds of photos by date and hoping.
Records also drive lifecycle budgeting. A five-year trend showing recurring sealant failure at the same window line tells you the joint design is the problem, not the sealant product. That insight changes the repair approach and the capital forecast. Cloud storage with version control and access permissions is the practical minimum; dedicated facility management platforms add workflow automation for larger portfolios.
How to choose the right facade specialists
Hire vendors who can document experience with your specific material type, carry appropriate insurance, and will commit to a written access and protection plan before mobilizing. The exterior cleaning vendor evaluation process applies equally to cleaning contractors and structural repair firms.
Questions to include in every RFP:
- What is your contractor license number and in which states are you licensed?
- What are your general liability and workers’ compensation insurance limits?
- Can you provide three references for projects involving this specific material type?
- What access method do you propose, and what is your site protection plan?
- For cleaning: what pressure settings and detergent types do you propose for each surface?
- For repairs: what repair specification and QC testing protocol will you follow?
Credentials and proof to require:
- Contractor license verified with the issuing state board
- Certificate of insurance naming your entity as additional insured
- Sample repair specification or method statement from a comparable project
- Willingness to follow findings from an ASTM E2270-based inspection report
- References you can actually call (not just names on a list)
Red flags that should end the conversation:
- Proposing the same pressure setting for every surface type
- Refusing to provide a written method statement before work begins
- No photo documentation in their standard scope of work
- A bid for capital repair work that is significantly below all others with no explanation
- Inability to name the specific products they plan to use
For curtain wall and glass facade components, long-term maintenance planning has its own set of considerations; the Glass Railing Store’s maintenance guide covers glass-specific upkeep expectations that translate well to curtain wall sealant and hardware inspection.
Whitediamondpressurewashing’s approach to safe facade cleaning
Soft washing and low-pressure chemical application are the safest and most effective cleaning approach for the majority of facade materials. The method works by letting biodegradable detergents do the work rather than relying on mechanical force, which means biological growth is killed at the root rather than blasted off the surface to regrow within weeks.
Common contractor mistakes that damage facades:
- Applying 3,000+ PSI to brick or stucco, which erodes mortar joints and forces water into cracks
- Using high-pH caustic cleaners on stone or terra-cotta, which strips glaze and etches the surface
- Skipping runoff containment, which sends detergent into storm drains and landscaping
- Failing to protect window seals and adjacent metal finishes before applying cleaning agents
- Delivering no post-clean documentation, leaving the property manager with no record of what was done
When specifying a cleaning contractor, request the following in writing before work begins:
- Proposed pressure settings (PSI) for each surface type on the building
- Detergent product names, pH levels, and application concentrations
- Runoff containment and disposal plan
- Method for protecting windows, landscaping, and adjacent finishes
- Commitment to deliver before-and-after photos as a contract deliverable
Soft washing with biodegradable, material-matched detergents removes biological growth at the root, protects mortar joints and coatings from mechanical damage, and leaves a documented before-and-after record that supports both compliance reporting and your next inspection cycle. That combination of safety, effectiveness, and documentation is what separates a professional cleaning program from a one-time pressure wash.
Pro Tip: Ask any cleaning contractor to show you the soft-washing process they use and the safety data sheets for every chemical they plan to apply. A contractor who cannot produce both on request is not ready to work on your building.
What consistent inspection and record-keeping actually prevents
The property managers who avoid facade emergencies are not the ones with the newest buildings. They are the ones who treat inspection reports as operational documents rather than compliance paperwork. A report filed and forgotten does nothing; a report that feeds a repair schedule, updates the service history, and informs next year’s budget is the actual tool.
The most repeated contractor error in facade cleaning is pressure. Not the interpersonal kind. Literally: too much water pressure applied to the wrong surface. Mortar joints in brick walls, glazed terra-cotta, and painted stucco are all routinely damaged by contractors who use a single pressure setting across an entire building because it is faster. The damage is not always visible immediately, but the next inspection will find it, and the repair cost will exceed what the cleaning saved.
Whitediamondpressurewashing supports your facade cleaning program
Facade cleaning done right protects the investment you have already made in inspections and repairs. Whitediamondpressurewashing delivers soft-washing and low-pressure exterior cleaning for commercial and residential buildings, using biodegradable, material-matched detergents and documented before-and-after photography on every job.

For property managers, that documentation matters. It supports your inspection record, confirms the cleaning was done to specification, and gives your next inspector a clean surface to work from. When you call, ask for a written method statement, proposed pressure settings by surface type, the detergent safety data sheets, and confirmation that runoff containment is included in the scope.
Schedule a service or request a free estimate at whitediamondpressurewashing.com. If you want to understand the advantages of low-pressure washing before your first call, that resource walks through exactly why lower pressure and the right chemistry outperform high-pressure approaches on most facade materials.
Sources
The sources below are the primary references used throughout this guide. Each one addresses a specific aspect of facade management that property teams should consult directly.
- E2270 Standard Practice for Periodic Inspection of Building Facades for Unsafe Conditions
- ASTM E2270 — Standard Practice for Periodic Inspection of Building Facades
- Facade Inspection & Safety Program (FISP) — NYC DOB
- AB-110 2016 San Francisco Existing Building Code
- Learning from exterior wall problems — Solinski (Brikbase)
- GLISA — Freeze-thaw cycles and climate impacts
Retain a licensed architect or engineer for formal inspection reports. Records from those inspections are the evidence base for compliance, insurance, and capital planning. No guide replaces a professional assessment of your specific building.
Recommended
- Building Facade Cleaning Doubles Material Lifespan – white-diamond-pressure
- Property Maintenance Checklist: Homeowner’s 2026 Guide – white-diamond-pressure
- Clean Parking Lots: A Property Manager’s Step-by-Step Guide – white-diamond-pressure
- Property Management Cleaning Contracts: A 2026 Guide – white-diamond-pressure
One thought on “How to Maintain Building Facades: A Property Manager’s Guide”