

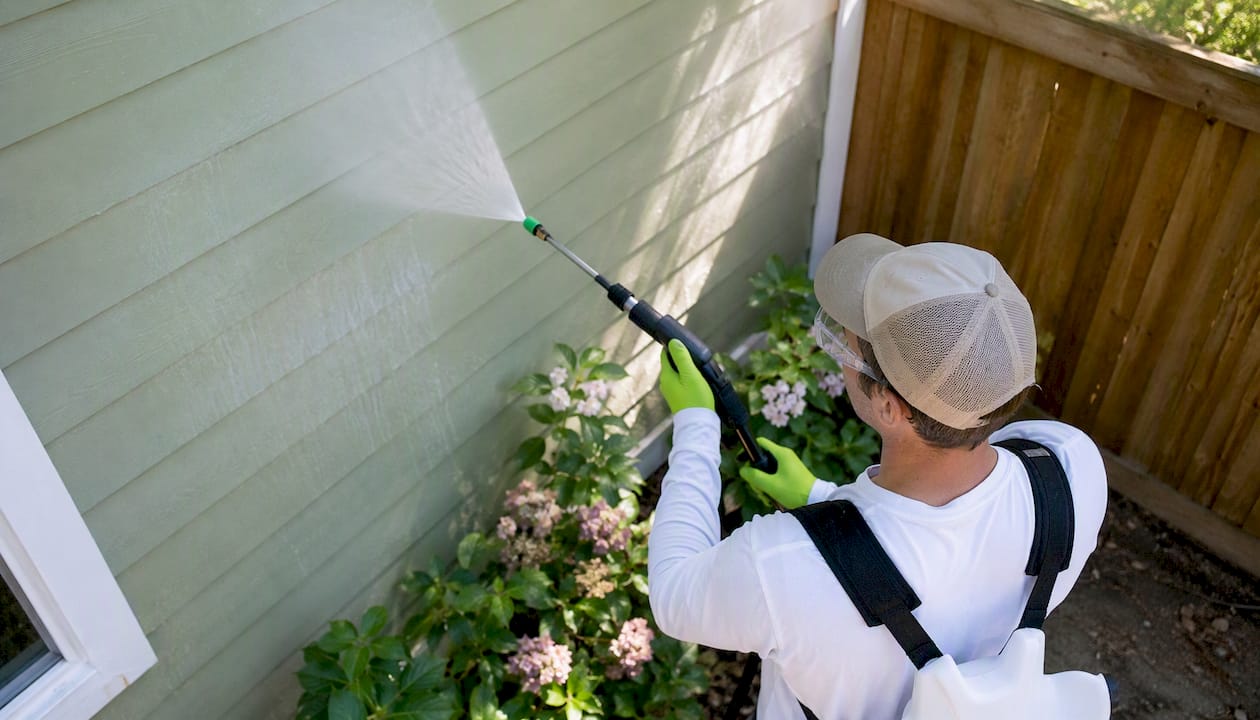
Regular, method-appropriate washing is the single most effective maintenance step you can take to extend exterior paint life. Specifically, an annual soft wash removes the mold, algae, and airborne contaminants that slowly eat through paint film from the outside in. Before repainting, a targeted soft wash 48–72 hours ahead of the first coat gives new paint a clean, dry surface to bond to.
Three things to do right now:
- Schedule an annual soft wash for all painted siding, trim, and fascia.
- Plan a pre-paint soft wash 48–72 hours before any repainting project, and verify dryness before priming.
- Call a soft-wash specialist for painted wood, fiber cement, or stucco siding rather than renting a pressure washer.
That is the short version. The rest of this guide explains why each step matters, how to do it safely, and what mistakes will cost you a repaint year ahead of schedule.
Key Takeaways
Washing exterior paint surfaces correctly and on schedule is the single most cost-effective way to prevent premature paint failure and avoid an early, expensive repaint.
| Point | Details |
|---|---|
| Soft wash for painted surfaces | Use 60–300 PSI with a biodegradable chemical solution; never use high-pressure on painted siding. |
| Annual wash baseline | Wash once per year minimum; twice per year in humid, coastal, or high-pollen climates. |
| Drying before painting | Wait 48–72 hours after washing before priming; verify wood moisture below 15% with a meter. |
| Wash before scraping | Always wash first, dry fully, then scrape and repair; this order produces a genuinely clean substrate. |
| Whitediamondpressurewashing | Provides pre-paint soft washing with written inspection notes and drying timelines for Citrus County properties. |
Table of Contents
- Why washing is the fastest way to prolong exterior paint
- Soft washing vs. pressure washing: which method protects your paint?
- What cleaning solutions actually work without harming paint or plants
- Step-by-step washing process for maintenance and pre-paint prep
- How to prepare a washed surface for painting so the new coat bonds
- Common washing mistakes that shorten paint life instead of extending it
- How often should you wash, and what to inspect each time
- When to hire a pro and what to ask before you book
- Expert note from Whitediamondpressurewashing on soft-wash best practices
- The real cost of skipping the wash
- Whitediamondpressurewashing handles the prep so your paint lasts
- Sources
Why washing is the fastest way to prolong exterior paint
Paint does not fail randomly. It fails because something breaks down the film, and that something is almost always biological or chemical contamination sitting on the surface.
Mold, mildew, and algae are the biggest culprits. They root into paint film, feed on the binders and pigments, and physically lift the coating from the substrate. Once you see black streaks or green patches on siding, the damage underneath is already underway. Dirt and airborne pollutants compound the problem by trapping moisture against the surface, accelerating oxidation and chalking. Chalking, the powdery residue that forms as paint degrades under UV exposure, is particularly destructive because it creates a loose, friable layer that prevents new paint from bonding.
Surface preparation is the single most important factor in exterior paint longevity, and inadequate prep is the leading cause of premature failure. That is not a minor caveat. It means a premium paint job applied over a dirty or chalked surface will fail faster than a budget paint job applied over a properly cleaned one.
Washing interrupts this cycle at the source. It removes the biological growth before it can penetrate deeper, strips chalking so new coats can grip, and clears the pollutants that trap moisture. Routine cleaning and prompt touch-ups can prevent premature paint failure and extend the lifespan of a paint job instead.
Key stat: Professional guidance consistently identifies inadequate surface preparation, not paint quality, as the primary driver of exterior paint failure.
Most paint manufacturers and professional contractors also require documented cleaning as a condition of warranty coverage. Skipping the wash before repainting does not just risk adhesion failure. It can void the warranty on the paint itself.
Soft washing vs. pressure washing: which method protects your paint?
The single biggest mistake homeowners make is treating all exterior washing as the same task. It is not. The method you choose determines whether you clean the surface or damage it.
Soft washing uses low pressure (typically 60–500 PSI) combined with a chemical solution, usually a sodium hypochlorite and surfactant mix, applied with dwell time to kill biological growth at the root. Soft washing protects painted surfaces and produces longer-lasting results than pressure-only methods because it addresses the biology rather than just blasting the visible symptom. Results from a proper soft wash can last multiple years; pressure-only cleaning in humid climates may need repeating within months.
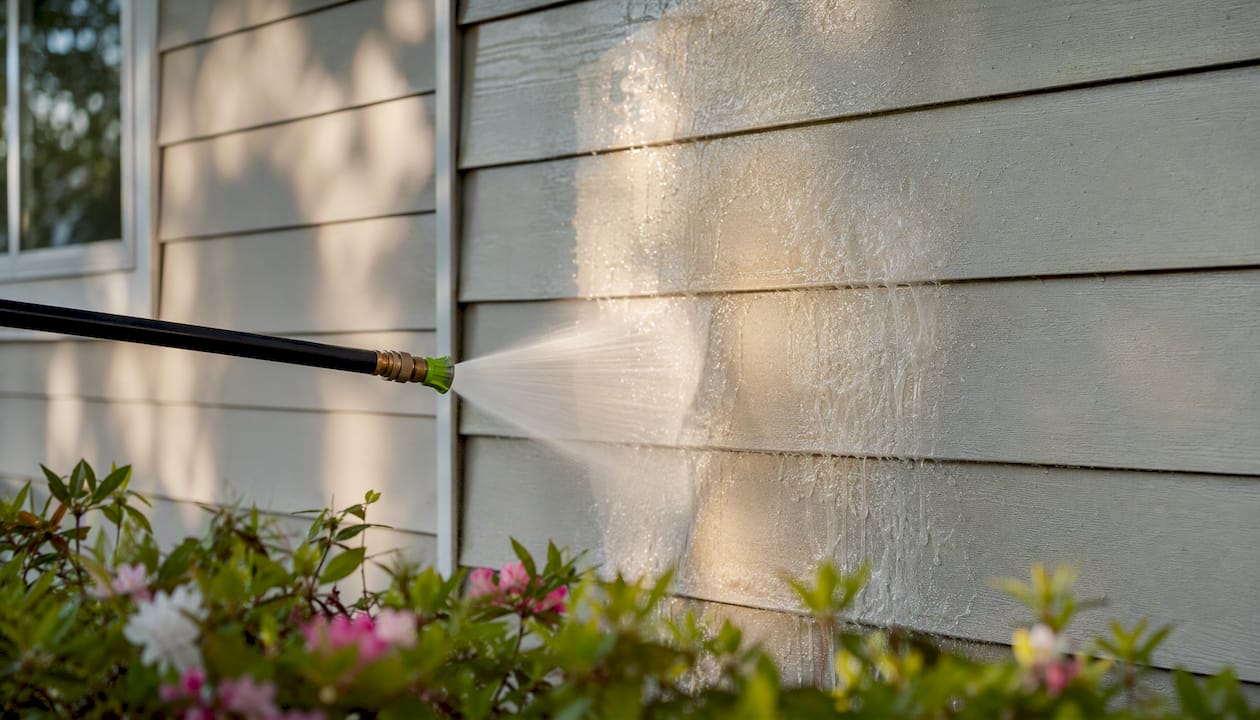
Pressure washing uses mechanical force (500–3,000+ PSI depending on the nozzle and distance) to remove surface debris. It is the right tool for concrete driveways, brick hardscape, and unpainted masonry. On painted siding, it is frequently the wrong tool.
Soft washing is preferable for delicate, finished surfaces; pressure washing is for hardscape and only selective stubborn areas. A few quick rules of thumb:
- Use soft wash for all painted siding, trim, roofs, and fascia.
- Use pressure washing for concrete, brick pavers, and uncoated masonry.
- For stubborn stains on painted surfaces, increase dwell time on the chemical solution before a low-pressure rinse rather than increasing PSI.
- Always use a wide-fan nozzle (25° or 40°) and keep the wand at least 12–18 inches from the surface.
For a deeper look at choosing between soft and power washing, the method differences matter more than most homeowners realize before they see the damage.
What cleaning solutions actually work without harming paint or plants
The chemistry matters as much as the pressure. The right solution kills biological growth at the root and rinses clean without stripping paint, damaging plants, or leaving residue that interferes with adhesion.
Bleach-based soft-wash mix: A diluted sodium hypochlorite solution (typically 1–3% concentration for house washing) combined with a surfactant is the standard professional formula. The surfactant helps the solution cling to vertical surfaces during dwell time. This mix kills mold, mildew, and algae effectively and rinses off without leaving a film. Do not exceed recommended concentrations on painted surfaces; higher concentrations can bleach pigment or attack paint binders.
TSP substitute for chalking: Trisodium phosphate (TSP) was the traditional degreaser for pre-paint prep, but most states now restrict it due to phosphate runoff concerns. TSP substitutes (phosphate-free formulas sold at hardware stores under names like Dirtex or Krud Kutter) perform similarly for removing chalking and grease without the environmental liability.
Commercial house-wash concentrates: Products designed specifically for soft-wash systems are formulated to be diluted, applied at low pressure, and rinsed thoroughly. They are worth the cost over DIY mixes when you are dealing with heavy biological growth or when you want a consistent, warranty-safe result.
Environmental and safety precautions:
- Wet down all landscaping before applying any cleaning solution, and rinse plants again immediately after the wash.
- Cover air conditioning units, electrical outlets, and vents before washing.
- Wear chemical-resistant gloves and eye protection when mixing or applying bleach-based solutions.
- Direct runoff away from storm drains where possible; PaintCare provides guidance on responsible handling of wash runoff and leftover paint products.
- Avoid washing on windy days when overspray can carry solution onto unintended surfaces.
For a full walkthrough of protecting your garden during exterior washing, plant protection is one of the steps most homeowners skip until something dies.
Chemicals to avoid on painted surfaces: Undiluted bleach, muriatic acid, and petroleum-based degreasers can strip paint, attack caulk, and void manufacturer warranties. If a product label does not specify compatibility with painted surfaces, do not use it.
Pro Tip: Test any cleaning solution on a small, inconspicuous area first, especially on older paint or custom colors. Wait 10 minutes and rinse. If the color shifts or the surface feels tacky, switch to a milder formula.
Step-by-step washing process for maintenance and pre-paint prep
This sequence works for both an annual maintenance wash and a pre-paint prep wash. The only difference is the drying window at the end.
- Protect the surroundings. Wet down all plants and shrubs within 10 feet of the work area. Cover electrical fixtures, outdoor outlets, and HVAC units with plastic sheeting. Close all windows and doors.
- Pre-rinse the surface. Use a low-pressure rinse (garden hose pressure is fine) to remove loose dirt and debris before applying any chemical solution. This prevents the detergent from being diluted by surface grime.
- Apply the cleaning solution. Working from the bottom up, apply your soft-wash solution using a low-pressure sprayer or soft-wash system. Bottom-up application prevents streaking from solution running down a dry surface.
- Allow dwell time. Let the solution sit for 5–15 minutes depending on the level of biological growth. Do not let it dry on the surface; if conditions are hot or windy, mist the surface lightly to keep it wet.
- Rinse from the top down. Use low pressure and rinse thoroughly, working top to bottom. Make sure all chemical residue is removed, especially around windows, trim, and caulked joints.
- Inspect the surface. Once rinsed, walk the perimeter and look for areas of persistent staining, peeling paint, cracked caulk, or biological growth that did not respond to the first application. Note these for the repair phase.
- Allow adequate drying time. For a maintenance wash, 24 hours is typically sufficient before any touch-up painting. For a full pre-paint prep wash, wait 48–72 hours minimum. In high-humidity climates or for porous materials like stucco and wood, extend that window to 72–96 hours. Washing before scraping and repair is the correct order: wash first, dry fully, then scrape and spot-prime.
Pro Tip: Before washing a large surface, test your solution and pressure on a 2-square-foot area in a low-visibility spot. Check for color change, surface texture shift, or paint lifting after 10 minutes. This one step prevents a small mistake from becoming a full-wall problem.
Pressure washing before painting is a required step in professional pre-paint prep and the single most reliable way to prevent adhesion failure and early peeling. For a detailed breakdown of the soft-wash process step by step, the chemistry and timing details make a real difference in how long results last.
How to prepare a washed surface for painting so the new coat bonds
Washing is the first step in pre-paint prep, not the only step. What you do in the 48–72 hours after the wash determines whether the new coat bonds for a decade or starts peeling in two years.
The correct sequence is: wash, dry fully, then scrape and repair. Washing first removes biofilm and chalking that would otherwise make scraping ineffective. Trying to scrape a surface covered in mildew just smears the contamination rather than removing it.
Post-wash repair checklist:
- Remove loose paint. Use a paint scraper or wire brush to remove all peeling, flaking, or bubbling paint. Feather the edges with 80–120 grit sandpaper so there is no hard ridge between bare substrate and intact paint.
- Replace damaged wood. Probe wood siding and trim with a screwdriver. Any area that compresses easily is rotted and needs replacement before painting. Paint over rotted wood is a temporary fix that fails within one season.
- Re-caulk all joints. Check every joint where siding meets trim, trim meets window frames, and anywhere two dissimilar materials meet. Remove cracked or separated caulk completely and replace with a paintable, exterior-grade siliconized acrylic caulk.
- Spot-prime bare substrate. Any area where you have scraped to bare wood, metal, or fiber cement needs a coat of appropriate primer before the finish coat. Skipping primer on bare spots is one of the most common causes of localized peeling within the first year.
- Verify moisture content. For wood substrates, use a moisture meter and confirm readings below 15% before priming or painting. Wood above 15% moisture will trap water under the paint film, causing bubbling and premature peeling. This is not a guideline; it is a threshold that many paint manufacturers state explicitly in their application instructions.
Key stat: Professional guidance identifies inadequate surface preparation, not paint quality, as the leading cause of exterior paint failure. Moisture verification and proper priming are the two most skipped steps in DIY prep.
Many paint warranties require documented professional prep and full substrate drying before application. If you are managing a multi-unit property, keep written records of wash dates, drying windows, and repair steps. Those records support warranty claims and simplify future maintenance planning. For more on pre-paint washing protocols, documented drying timelines are worth building into your standard process.
Common washing mistakes that shorten paint life instead of extending it
Most paint damage from washing comes from a handful of predictable errors. Here is what to watch for.
- Using too much pressure on painted siding. Anything above 500 PSI on painted wood or fiber cement risks raising the grain, forcing water behind panels, and stripping paint at edges and joints. The damage is not always visible immediately; trapped moisture shows up as blistering weeks later.
- Washing in direct sunlight. Hot surfaces cause cleaning solutions to dry before they can work and before they can be rinsed off completely. Dried bleach residue on painted surfaces can bleach pigment and interfere with adhesion. Wash in the early morning or on overcast days.
- Using the wrong nozzle angle. Directing the spray upward at siding panels forces water behind the laps, where it cannot dry and creates the exact moisture conditions that cause rot and paint failure. Always spray downward at a slight angle, following the direction the siding sheds water naturally.
- Painting too soon after washing. This is probably the most common mistake. Surfaces that look dry on the outside can still hold significant moisture in the substrate, especially wood and stucco. Painting over retained moisture causes bubbling, blistering, and peeling within months.
- Using the wrong chemicals. Undiluted bleach, acid-based cleaners, and petroleum degreasers can strip paint, attack caulk, and leave residue that prevents adhesion. Always verify chemical compatibility with your specific siding material and paint type.
- Skipping plant and fixture protection. Bleach-based solutions will damage or kill plants if they are not pre-wetted and rinsed promptly. Overspray on electrical fixtures is a safety hazard. These are not optional precautions.
- Ignoring substrate-specific limits. Fiber cement manufacturers like James Hardie publish specific pressure and chemical guidelines. Exceeding those guidelines can void the product warranty. Stucco is particularly vulnerable to high-pressure washing because water can penetrate micro-cracks and cause subsurface damage that is expensive to repair.
When in doubt about pressure, chemistry, or substrate compatibility, the right call is to hire a professional rather than risk a repair bill that exceeds the cost of the original paint job.
How often should you wash, and what to inspect each time
For most U.S. climates, one soft wash per year is the right baseline. Annual cleaning with mild detergent and targeted stronger solutions for mildew helps maintain paint and prepares surfaces for repainting. Adjust that frequency based on your local conditions.
Frequency by climate:
- Humid or subtropical climates (Florida, Gulf Coast, Southeast): twice per year, or at minimum after the rainy season ends.
- Coastal properties: twice per year; salt air accelerates chalking and biological growth significantly.
- High-pollen regions: once per year in spring after pollen season peaks.
- Dry, low-humidity climates: once per year is usually sufficient, with spot cleaning as needed.
Seasonal inspection checklist:
- Spring: Check for mildew and algae growth that developed over winter. Inspect caulk around windows and doors for cracking or separation. Look for peeling or bubbling paint on south- and west-facing walls, which take the most UV exposure.
- Post-storm: Rinse siding with a garden hose after any significant storm to remove debris, salt, and organic matter before it has time to stain or feed biological growth.
- Fall: Check for raised grain on wood siding, cracked caulk at joints, and any areas where paint has thinned enough to show substrate. These need repair before winter moisture cycles stresses them further.
What to document: For property managers, a simple log of wash dates, observed conditions, and repairs made is worth maintaining. It supports warranty claims, helps you track deterioration patterns across a building, and gives contractors the context they need to quote accurately. Professional cleaning extends the lifespan of your home most reliably when it is part of a scheduled, documented maintenance cycle rather than a reactive response to visible damage.
When to hire a pro and what to ask before you book
Some jobs are genuinely DIY-friendly. A single-story vinyl-sided house with accessible walls and a garden hose is manageable for a careful homeowner. But several situations call for a professional soft-wash crew.
Hire a professional when:
- The siding is painted wood, fiber cement, or stucco, where excess pressure causes damage that is expensive to repair.
- The building is multi-story or has areas that require ladder work above 10 feet.
- There is visible biological growth (black streaks, green patches, orange lichen) that has been present for more than one season, indicating root systems in the paint film.
- The property has a manufacturer or paint warranty that requires documented professional prep.
- You do not have access to a proper soft-wash system (a garden hose and a spray bottle are not a substitute).
Questions to ask any contractor before booking:
- What PSI do you use on painted siding, and how do you adjust for different substrates?
- What cleaning solution do you use, and is it biodegradable and safe for landscaping?
- Are you licensed, insured, and bonded? Can you provide a certificate of insurance?
- Do you offer a written pre-paint wash plan that includes the cleaning sequence, drying timeline, and inspection notes?
- What is your drying-time recommendation before priming, and will you document it in writing?
- Can you provide references from similar projects, specifically pre-paint prep work?
Pro Tip: Ask the contractor to walk the property with you before they start and point out any areas of concern, such as cracked caulk, soft wood, or paint that is already failing. A contractor who does this is doing their job; one who skips it is setting you up for a dispute later.
For guidance on evaluating exterior cleaning vendors, the questions above are a solid starting framework.
Expert note from Whitediamondpressurewashing on soft-wash best practices
At Whitediamondpressurewashing, the pre-paint soft wash is one of the most requested services, and the workflow is consistent: we operate in the 60–300 PSI range for all painted surfaces, use biodegradable sodium hypochlorite and surfactant solutions at appropriate dilutions for the substrate, and build dwell time into every application rather than compensating with pressure.
For pre-paint work specifically, we schedule the wash 48–72 hours before the painting crew arrives. In Citrus County’s humid climate, we often extend that to 72–96 hours for wood and stucco, and we include a moisture-meter check as part of the pre-paint inspection. That check is not optional; it is the step that prevents the most common post-paint failure we see, which is bubbling caused by painting over substrate that looked dry but was not.
Every pre-paint cleaning quote we provide includes a written scope covering the cleaning sequence, the chemical mix, the masking plan for windows and fixtures, and the recommended drying window. That documentation protects both the homeowner and the painting contractor.
Pro Tip: In high-humidity months, schedule your soft wash for early morning and plan for a 72-hour drying window minimum. Afternoon washes in humid conditions leave surfaces that feel dry to the touch but still read above 15% moisture on a meter.
The real cost of skipping the wash
Here is the part most paint guides gloss over: the financial case for washing is not about the wash itself. It is about avoiding the repaint.
A full exterior repaint on an average American home runs several thousand dollars in materials and labor. A professional soft wash costs a fraction of that. The math is not complicated. What makes it complicated is that paint failure is gradual. You do not wake up one day to a wall that has failed overnight. You see a little peeling here, some mildew there, and you keep deferring the maintenance wash because nothing looks urgent yet. By the time it looks urgent, you are already past the point where washing alone fixes it.
The properties that consistently get the most out of their paint jobs are not the ones with the most expensive paint. They are the ones where someone washes the exterior on a schedule, catches caulk failures in the fall, and calls a soft-wash crew before repainting rather than after the adhesion has already failed. That discipline is worth more than any premium coating.
Whitediamondpressurewashing handles the prep so your paint lasts
Skipping the wash before repainting is the fastest way to waste a paint budget. Whitediamondpressurewashing provides professional soft washing and pre-paint prep for residential properties across Citrus County, using low-pressure, biodegradable cleaning methods that protect your siding, satisfy manufacturer warranty requirements, and give your painting contractor a surface that is genuinely ready to coat.

Services include house washing, soft washing, driveway and walkway cleaning, and full pre-paint prep with written inspection notes and drying timelines. Whether you need an annual maintenance wash or a pre-paint clean before a full repaint, the process is the same: right chemistry, right pressure, right drying window. Visit the services page for a full list of what is covered, or explore the soft-wash process explained to see exactly how the method works. Request a free estimate and get a written pre-paint wash plan with your quote.
Sources
These resources cover the technical standards, safety guidance, and manufacturer requirements referenced throughout this article.
- Pressure Washing Before Painting Exterior Surfaces: What Property Managers Need to Know – Elements Painting Inc.
- Exterior painting complete guide: preparation & application – Build & Construct
- Soft Washing Protects Paint: 5 Critical Truths About Stripping vs. Saving Your Finish – J.O.’s Exteriors
- Soft Wash vs Pressure Wash: What’s the Difference? | On Spot Power Washing
- How to paint your home’s exterior – This Old House
- How to properly maintain and extend the lifespan of exterior paint – PCI Magazine
- Soft Washing vs Pressure Washing: Which One Does Your Home Actually Need? – AquaSudz Pressure Washing
- PaintCare
One thought on “How to Prolong Exterior Paint Life With Washing”