

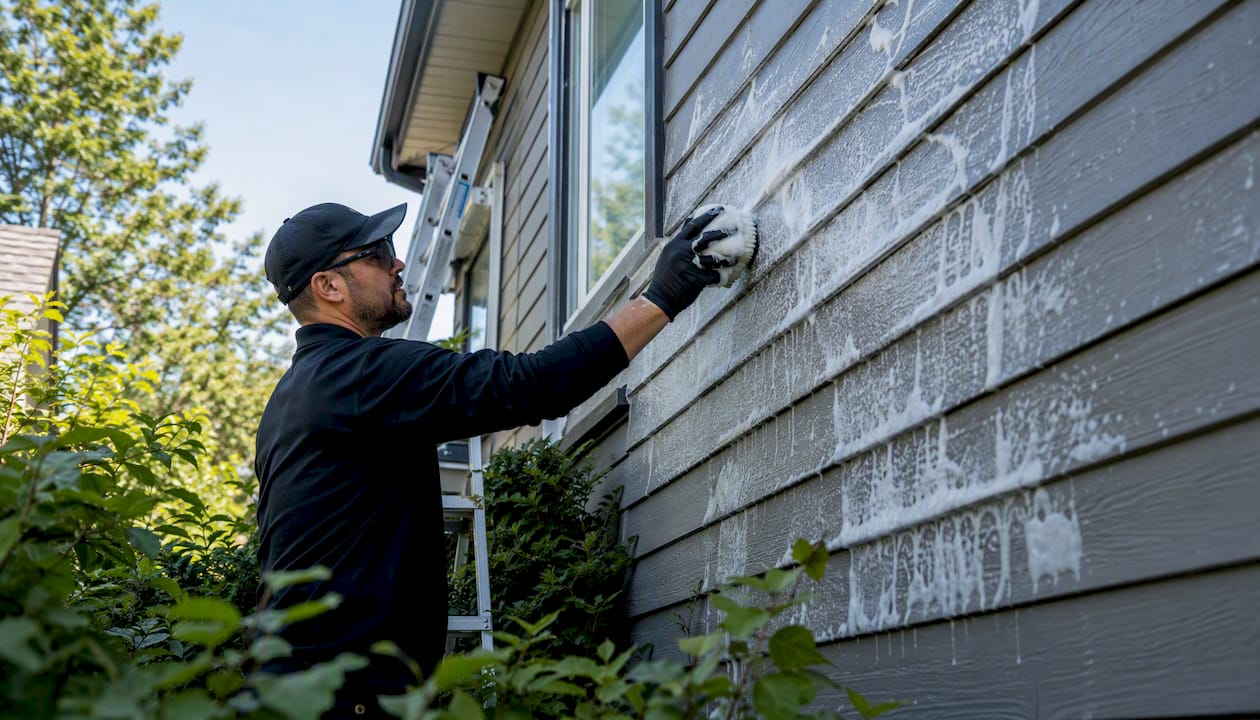
Painted siding can be pressure washed, but only with low pressure or true soft-wash chemistry, never a straight high-pressure blast. The single rule that separates a clean house from a $4,000 paint and siding repair bill: keep the wand angled downward and hold a standoff distance of at least 12 to 18 inches from the surface. Get closer than that with a narrow nozzle and you risk stripping paint, gouging boards, or forcing water behind the panels where it causes rot for months before you notice.
Here’s your immediate move before anything else: pick an inconspicuous section, low pressure, wide fan tip, and watch what happens. The Spruce and Consumer Reports both flag painted exteriors as a category where technique matters more than raw power, and at Whitediamondpressurewashing we’ve inspected enough failed DIY jobs to agree completely.
Three things to confirm before you touch the trigger:
- Paint is intact, with no peeling, chalking, or loose sections near trim.
- The house predates 1978 only if you’ve ruled out lead paint or plan to treat it as a lead-safe job.
- You know your siding material, since vinyl, wood, aluminum, and fiber cement each tolerate different pressure levels.
Pro Tip: Stand back and spray at a slight downward angle, never straight-on or upward into a seam. Water that gets forced upward under a lap joint has nowhere to go but into your wall cavity.
Key Takeaways
Painted siding survives cleaning when the method uses low pressure or soft-wash chemistry, a downward spray angle, and a tested approach rather than raw force.
| Point | Details |
|---|---|
| Soft wash first | Chemistry kills mildew at the root while low pressure rinses it away, cutting damage risk versus high-pressure blasting. |
| Test before committing | Try a hidden section for a few minutes and check for paint lifting or color change before treating the whole wall. |
| Keep distance and angle | Hold 12 to 18 inches for application, angle the wand downward, and never spray upward into seams or laps. |
| Protect what’s fragile | Cover plants, electrical fixtures, and vents, and treat any pre-1978 paint as a possible lead concern. |
| Hire out the high-risk jobs | Multi-story homes, heavy mold, and brittle old paint call for a soft-wash professional like Whitediamondpressurewashing. |
Table of Contents
- When Pressure Washing Painted Siding Goes Wrong
- Material-by-Material Guidance for Painted Siding
- Safe Pressure, Nozzles, and Standoff Distance Explained
- Choosing the Right Cleaning Solution for Painted Siding
- The Step-by-Step Method for Cleaning Painted Siding
- Safer Alternatives When Pressure Washing Isn’t the Right Call
- When to Call a Professional for Painted Siding
- Pro Techniques Most DIYers Never Learn
- Why We Default to Soft Wash First
- Book a Soft-Wash Cleaning Without the Guesswork
- Sources
When Pressure Washing Painted Siding Goes Wrong
Most siding damage isn’t caused by dirt. It’s caused by someone standing too close with too much pressure, or using the wrong nozzle on a paint job that’s already past its prime.
The failure modes are predictable once you’ve seen them a few times: paint stripping off in ribbons, boards gouged where the stream held still too long, water punched behind panels through gaps in caulk, and mold or rot that shows up weeks later once trapped moisture has had time to work. On older homes, there’s a separate and more serious concern. Pressure washing can knock loose lead-based paint chips and drive them into the surrounding soil, creating contamination that’s expensive and difficult to remediate. Any home built before 1978 deserves testing or a professional lead-safe approach before anyone points a wand at it.
Certain conditions are a hard stop, not a “proceed with caution”:
- Peeling or loose paint anywhere on the wall, since pressurized water will finish the job the weather started.
- Visible wood rot or soft spots, which means water is already getting in somewhere.
- Unknown paint age on a pre-1978 home, a lead-paint red flag until proven otherwise.
- Cracked or missing caulk around windows, doors, and seams, an open invitation for water intrusion.
- Fragile or damaged trim, which usually can’t handle even moderate pressure.
Warranties add another layer most homeowners never think about until it’s too late. Many siding manufacturers limit or void coverage when high-pressure equipment or unapproved cleaners are used, and the fine print rarely gets read until there’s a claim to file. Check the manufacturer’s care documentation before you start, and if you’re hiring it out, ask the contractor directly whether their method is warranty compliant.
Electrical components, exterior vents, and windows also need attention before the water goes on. Cover outlets and light fixtures, close windows tightly, and never aim a direct stream at a vent. It sounds obvious until you’re mid-job and the wand drifts.
Material-by-Material Guidance for Painted Siding
Not all painted siding behaves the same way under water and pressure. Treating vinyl like wood, or wood like fiber cement, is how good intentions turn into a repaint job.
Painted vinyl responds best to soft-wash chemistry rather than raw pressure. Vinyl and painted siding clean up well with a low-pressure chemical application followed by a moderate-pressure rinse using a wide fan nozzle, because the cleaning solution does the actual work of killing mildew while the rinse just carries it away. Push too much PSI at painted vinyl and you can crack panels or blow them loose at the seams, and yes, warranty voidance is a real risk here too.
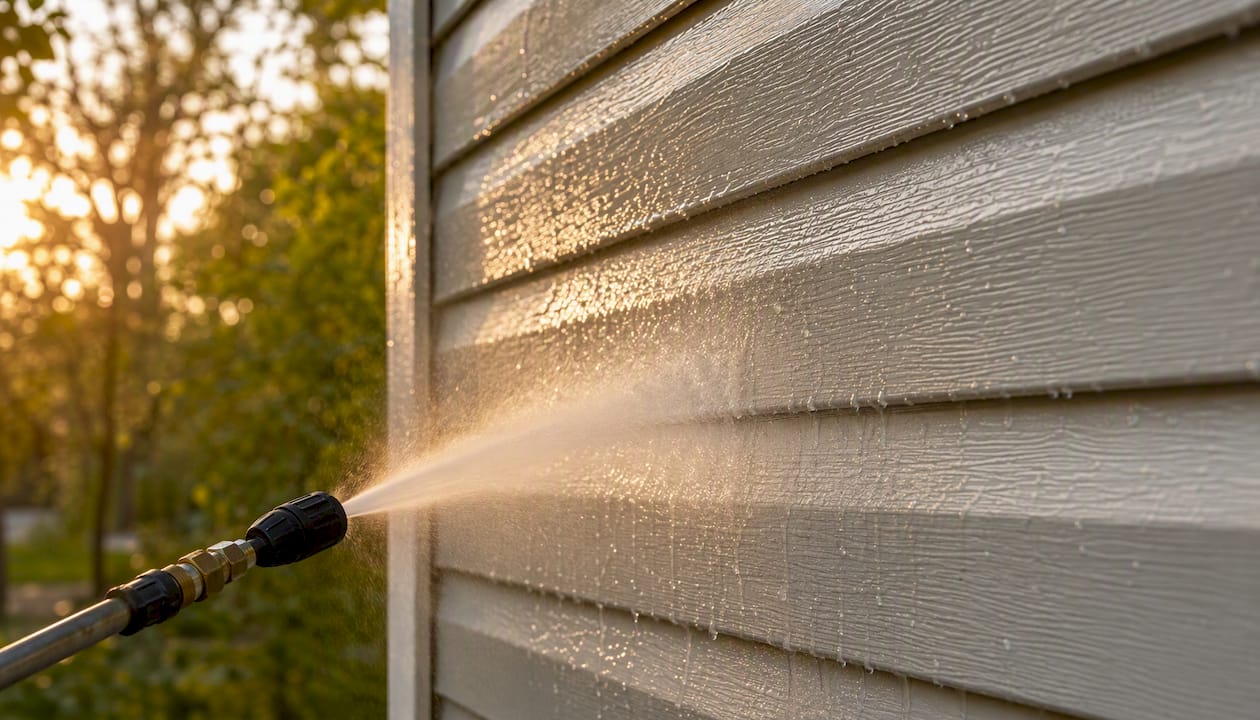
Painted wood is the most delicate material on this list. High-pressure water on wood siding drives moisture behind the boards, strips paint outright, and gouges softer grain, setting up conditions for rot that can take months to surface. The safer path is soft brushes, appropriate cleaners, and the lowest pressure setting that still lifts dirt, followed by a real drying period before repainting or resealing.
Aluminum and metal siding tolerates more than wood, but it isn’t bulletproof. Skip stream-style or turbo nozzles near seams, and stay clear of window trim where water can find a way in behind the flashing.
Fiber cement and composite siding can generally handle a firmer approach than wood or vinyl, but “can handle more” doesn’t mean “blast away.” Painted fiber cement in particular still benefits from a gentler soft-wash pass, since the paint film sitting on top of the cement board is exactly as vulnerable as paint on any other surface.
Before starting on any material, walk the house and check paint condition, loose trim, caulk integrity, the approximate age of the paint job, and any visible mold or algae growth. That five-minute inspection tells you more about safe technique than any generic PSI chart. For a deeper look at how the two approaches diverge, see how soft washing compares to traditional power washing.
Pro Tip: When you’re not sure what you’re dealing with, treat the siding as fragile. Start with soft-wash chemistry and a low rinse pressure, and only increase intensity if the test spot proves it can take it.
Safe Pressure, Nozzles, and Standoff Distance Explained
Numbers matter here more than instinct. Most DIY damage happens because someone eyeballed “low pressure” and got it wrong by a factor of three.
Industry operator guidance for vinyl and painted siding describes a two-pass approach: a low-pressure chemical application around 100 to 200 PSI equivalent flow to kill growth, followed by a controlled rinse at 200 to 500 PSI using a wide fan nozzle. That’s dramatically lower than the 2,000 to 3,000 PSI many consumer pressure washers can produce at the nozzle, which is exactly why so many homeowners overdo it without realizing.
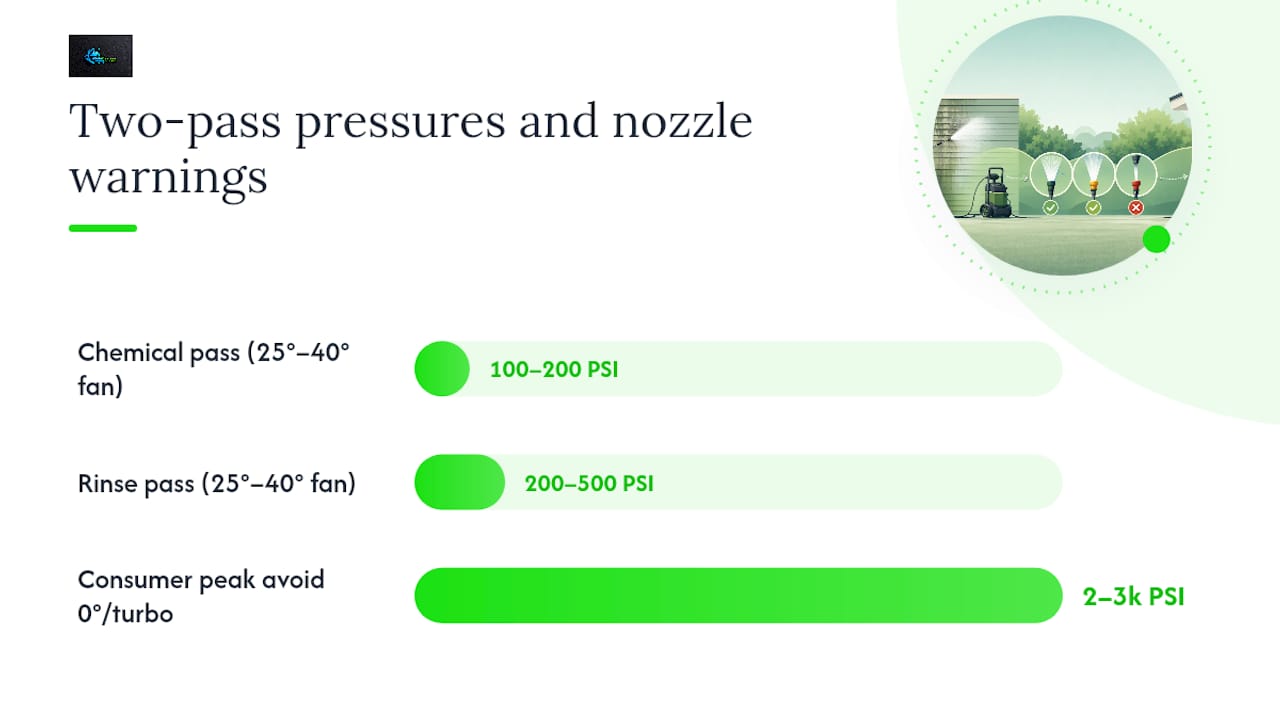
Nozzle choice matters as much as PSI. Use a wide fan tip, generally 25° to 40°, for both application and rinse passes. Never use a 0° pinpoint or a rotary/turbo nozzle on painted siding. Those nozzles concentrate force into a tiny area and will etch, strip, or gouge a painted surface almost instantly, even at moderate pressure.
Distance does the rest of the work. Hold roughly 12 to 18 inches away during chemical application, and you can tighten to 6 to 12 inches for the rinse pass as long as you keep a downward spray angle and never point the stream upward into laps or seams. Some guides recommend simply starting about three feet back and moving closer only after confirming the surface can take it, which is a reasonable way to calibrate if you don’t have a PSI gauge handy.
Technique ties it together:
- Apply cleaning solution bottom-up to prevent streaking as it runs down the wall.
- Rinse top-down once dwell time is finished, so loosened dirt and organic growth wash off cleanly.
- Keep the wand moving in a consistent sweeping motion. A stationary stream at any pressure is what etches paint.
Pro Tip: Test wide and soft first. If there’s no streaking or paint lifting after a minute of observation, you can tighten distance slightly. If you see any lightening of the paint color, back off immediately, that’s the surface telling you it’s had enough.
Choosing the Right Cleaning Solution for Painted Siding
The chemistry does more of the actual cleaning work than the water pressure does, which surprises most homeowners who assume power equals results.
Oxygen bleach (non-chlorine) is a solid, siding-safe option for general dirt and light mildew, with less risk of discoloring paint or harming nearby plants than harsher chemistries. Sodium hypochlorite-based soft-wash mixes are standard industry practice for heavier mildew and algae, and operator guidance recommends on-surface concentrations around 1 to 2 percent, applied at low pressure and never blasted on with a high-pressure stream. Siding-safe surfactants can be added to either approach to help the solution cling to vertical surfaces instead of running off before it works.
Dwell time is where a lot of DIY jobs go sideways. Mildewcides and biocides need contact time to actually kill growth at the root rather than just knocking spores off the surface, but they can’t be allowed to dry on painted siding. Watch the treated section, and rinse before the solution bakes on in direct sun. Pre-wet nearby plants and shrubs, and give them a thorough re-rinse once the job is done to dilute any runoff.
One detail worth knowing even if you never do this part yourself: professionals typically apply bleach-based solutions through a downstream injector or dedicated soft-wash pump rather than routing it through the pressure washer’s main pump. That protects the pump’s internal seals from corrosion and keeps dilution consistent, which is part of why a properly equipped soft-wash setup produces more even results than a garden-variety consumer pressure washer with a chemical tank strapped on.
Whatever solution you choose, test an inconspicuous area first, ideally a spot near the foundation or behind a shrub, and give it a few minutes to confirm there’s no color change or finish reaction before treating the whole house.
The Step-by-Step Method for Cleaning Painted Siding
Follow this in order. Skipping steps, especially the test spot, is where most avoidable damage happens.
- Prep the site. Cover or relocate plants, protect outdoor electrical fixtures, close all windows, and repair any obviously loose trim or failing caulk before you introduce water.
- Gather basic PPE. Safety glasses and closed shoes at minimum, since soft-wash chemistry can splash back.
- Pick a hidden test spot. Choose a small area near a corner or behind landscaping, apply your chosen solution at low pressure, and wait several minutes.
- Inspect the test spot. Look for lifting paint, color change, or streaking. If it looks clean and the paint holds, proceed. If not, dial back pressure or switch cleaners before continuing.
- Apply cleaning solution bottom-up. Work in small, manageable sections rather than the whole wall at once.
- Let it dwell, watching closely so it never dries on the surface in direct sun.
- Rinse top-down with a wide fan nozzle at the correct pressure and standoff distance, keeping the wand angled downward the entire time.
- Move to the next section and repeat, rinsing each area before the solution has a chance to dry.
- Inspect the finished wall for any signs of water intrusion, paint damage, or spots that need a second pass.
- Let everything dry fully before deciding whether spot repairs or repainting prep come next. If you’re prepping for a repaint job, remember that washing is meant to clean, not strip, stripping is a separate task with separate tools. For more on why this sequencing matters, see why cleaning before painting protects the final result.
Pro Tip: Work in sections no bigger than what you can rinse in a few minutes. A whole-wall application that sits too long in the sun is asking for streaks or, worse, a chemical burn on the paint.
Safer Alternatives When Pressure Washing Isn’t the Right Call
Sometimes the right answer is to skip the pressure washer entirely, especially on siding that’s already showing its age.
Soft washing remains the gold standard alternative for exactly the reasons already covered: chemistry does the killing, low pressure does the rinsing. Hand scrubbing with a soft-bristle brush and a bucket of diluted cleaner works fine for small mildew patches or a single problem section. A garden hose with a foaming attachment and basic detergent handles light dust and pollen buildup between deeper cleanings. Specialty extended-reach cleaning wands that attach to a standard garden hose can also get to second-story sections without a ladder or a pressure washer at all.
If the siding is heading toward a repaint anyway, sometimes the smarter move is targeted scraping and repaint prep rather than a full wash cycle that risks the existing paint film further. Low-pressure washing carries fewer risks for delicate or aging painted surfaces than a full-pressure approach, which is worth weighing before you commit to a method.
Once cleaning is done, small repairs are often necessary. Re-caulk any gaps around windows and seams once everything is bone dry. Spot-prime and touch up small areas of peeled paint rather than waiting for it to spread. If a panel shows real rot or structural softness, replace it rather than patch it. One caution that applies across the board: don’t attempt any of these repairs until the siding and the sheathing behind it have had time to fully dry and get properly inspected. Sealing moisture in behind fresh caulk or paint just delays the rot, it doesn’t stop it.
When to Call a Professional for Painted Siding
Certain situations tip the scale firmly toward hiring it out, and pretending otherwise usually costs more than the service call would have.
Multi-story homes put you on a ladder with pressurized equipment, a combination that causes more injuries than most people expect. Heavy, established mold or algae growth often needs stronger, properly diluted chemistry than a homeowner setup can safely mix. Brittle or clearly old paint, visible signs of water intrusion, or any lead-paint concern on a pre-1978 home are all situations where a mistake gets expensive fast.
If you decide to hire someone, ask direct questions before you book:
- Do you use soft-wash equipment, meaning a downstream injector or dedicated low-pressure system, rather than a single high-pressure setup for everything?
- Are you insured, and can you provide proof?
- Can you share references from jobs on similar siding material?
- What chemical concentrations and dwell times do you use on painted surfaces?
- What pressure and nozzle settings do you run for rinse passes?
- Will your method preserve my siding’s manufacturer warranty?
- Do you provide a written summary of the method used and a post-job inspection?
A credible contractor answers these without hesitation and usually offers a written method summary as a matter of course, not because you asked twice. That documentation matters if a warranty question ever comes up later. For a fuller rundown of what to look for, see this vendor evaluation checklist for homeowners.
Pro Techniques Most DIYers Never Learn
A handful of small habits separate a professional soft-wash job from a DIY attempt, and none of them require expensive equipment, just experience.
Routing chemistry through a downstream injector instead of the pressure washer’s main pump keeps corrosive solution off the pump seals and gives more consistent dilution than a jury-rigged chemical tank. Applying bottom-up is standard practice specifically to avoid the streaking that happens when solution runs down over an already-dry section. Pre-wetting nearby plants before starting, then giving them a thorough re-rinse afterward, protects landscaping from chemical runoff far better than covering them and hoping for the best.
Pros also run a few quick checks most homeowners skip entirely: a small adhesion test on the paint before committing to full coverage, a caulk tightness check around window and door seams before any water goes on, and, on older or suspect walls, a moisture probe check on sheathing that might already be compromised. These small tests take minutes and catch problems before they turn into repair bills.
Pro Tip: If a section of siding sounds hollow or feels soft when you press on it before you even start, that’s compromised sheathing underneath. Cleaning it won’t fix anything, and adding water is the wrong move until it’s repaired.
Why We Default to Soft Wash First
We’ve walked up to more damaged siding jobs than we’d like to admit, homes where a well-meaning DIY attempt or a corner-cutting contractor used straight high pressure and left behind stripped paint, gouged boards, or water damage that didn’t show up until the drywall inside started bubbling weeks later. That pattern is exactly why soft washing is our default recommendation for painted exteriors, not a marketing preference.
Low pressure and the right chemistry protect three things at once: the paint film itself, the manufacturer warranty that high-pressure methods routinely void, and the long-term value of the house. Chemistry kills mildew at the root rather than just knocking spores loose, which is part of why soft-wash results tend to hold up longer than a pressure-only rinse. Once you’ve seen the alternative, it’s hard to argue for anything else on a painted surface.
Book a Soft-Wash Cleaning Without the Guesswork
If everything above has you leaning toward hiring it out rather than testing your own siding’s limits, that’s a reasonable call, especially on multi-story homes or older paint. Whitediamondpressurewashing runs soft washing as the default method for painted siding, not an upsell option, which means you’re not paying extra to get the lower-risk approach.

A typical booking includes an inspection of your siding and paint condition, a test spot before any full application, a stated method and chemical list so you know exactly what’s going on your house, and proof of insurance on request. After the job, you get a follow-up check rather than a crew that packs up and leaves the moment the water stops running. That process is laid out in detail in our soft-wash process walkthrough, and the full service list, including house washing, roof cleaning, and driveway cleaning, is on our services page. If your siding is showing mildew, chalking paint, or you’re just not sure it can handle a DIY attempt, get a free estimate and we’ll tell you straight whether it’s a soft-wash job or something that needs a closer look first.
Sources
For manufacturer warranty cautions, check your siding’s own care documentation before choosing a cleaning method, since coverage terms vary by brand. For soft-wash chemistry details and PSI ranges, the vinyl siding operator guide from MakeWash breaks down dilution and dwell time. For general house-washing technique and standoff distance, The Spruce’s pressure washing guide is a solid reference. For wood-specific care, Bob Vila’s wood siding cleaning guide covers gentler methods in more depth. For lead-paint precautions on older homes, Consumer Reports’ surface safety guide is worth a full read. For a broader look at safe technique and damage avoidance, Southern Living’s siding guide and Home Depot’s how-to guide both add practical starting points for testing pressure and nozzle choice. If your exterior maintenance plans extend beyond siding, this outdoor space maintenance guide covers related routine care worth folding into a seasonal schedule.
- How to Safely Pressure Wash Your House
- Pressure Washing Vinyl Siding: Complete Operator Guide · MakeWash
- Can You Pressure Wash Siding? The Right Way To Clean It Without Causing Damage
- How to Clean Wood Siding
- Surfaces safe to clean with a pressure washer
Recommended
- How to Prolong Exterior Paint Life With Washing – white-diamond-pressure
- Avoid These Pressure Washing Mistakes: Safer, Cleaner Home – white-diamond-pressure
- Role of Water Pressure in Safe Exterior Cleaning – white-diamond-pressure
- Soft Washing Process Explained: A Step-by-Step Guide for Safety – white-diamond-pressure