TL;DR:
- Paver cleaning is essential for removing dirt, algae, mold, and stains to restore surface appearance and prepare for sealing. Professionals recommend cleaning every 1 to 2 years to prevent damage, ensuring surfaces are fully dry before applying sealers to avoid failure. Using proper pressure, enzymatic cleaners, and manual scrubbing preserves paver integrity and extends their lifespan.
Paver cleaning is defined as the deep removal of dirt, algae, mold, efflorescence, oil stains, and old sealer residue from paved surfaces to restore their appearance and prepare them for sealing or long-term maintenance. Industry professionals treat it as a foundational maintenance step, not an optional cosmetic touch. The process uses pressure washing, chemical or enzymatic cleaners, and manual scrubbing depending on the surface condition. Experts recommend cleaning every 1 to 2 years to prevent organic growth and contaminant buildup that leads to structural damage and costly repairs.
What is paver cleaning vs. paver sealing?
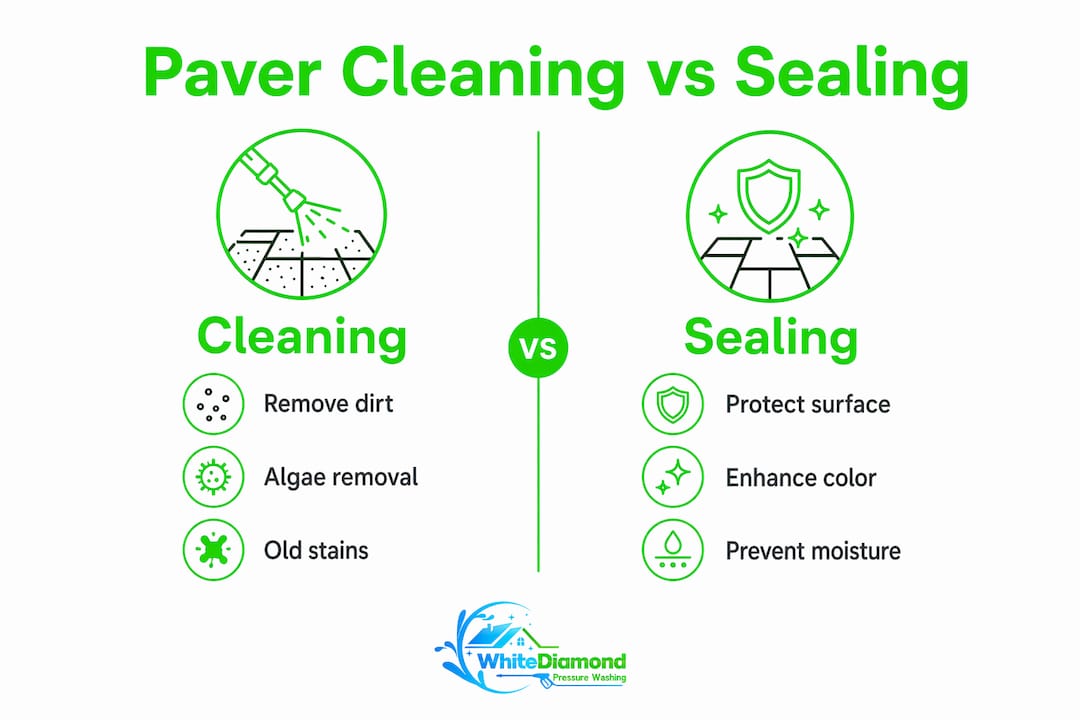
Paver cleaning and paver sealing are two separate steps that serve completely different purposes. Cleaning removes contaminants. Sealing protects the surface after cleaning is done. Homeowners who confuse the two often skip cleaning and go straight to sealing, which is one of the most damaging mistakes you can make.
Sealing over dirty surfaces causes peeling, uneven coverage, and traps moisture underneath the sealer layer. That trapped moisture accelerates the exact damage you were trying to prevent. Cleaning first gives the sealer a clean, dry surface to bond with, which directly improves adhesion and longevity. Properly prepared pavers produce better-looking and longer-lasting results after sealing.
Here is a direct comparison to clarify the distinction:
| Category | Paver cleaning | Paver sealing |
|---|---|---|
| Primary goal | Remove dirt, stains, algae, and old sealer | Protect surface and enhance color |
| Methods used | Pressure washing, chemical cleaners, scrubbing | Roller, sprayer, or brush application of sealer |
| Result | Clean, open-pored surface ready for treatment | Sealed, protected, water-resistant surface |
| Recommended frequency | Every 1 to 2 years | Every 2 to 4 years depending on traffic and climate |
Pro Tip: Never apply sealer to a surface that has not fully dried after cleaning. Moisture trapped under sealer causes bubbling and premature failure, which means you will be redoing the job within months.
Which paver cleaning methods are effective and safe?
The right cleaning method depends on what you are dealing with. Light dirt and dust call for a different approach than heavy algae growth or oil stains. Using the wrong method, or the right method at the wrong intensity, causes more harm than good.
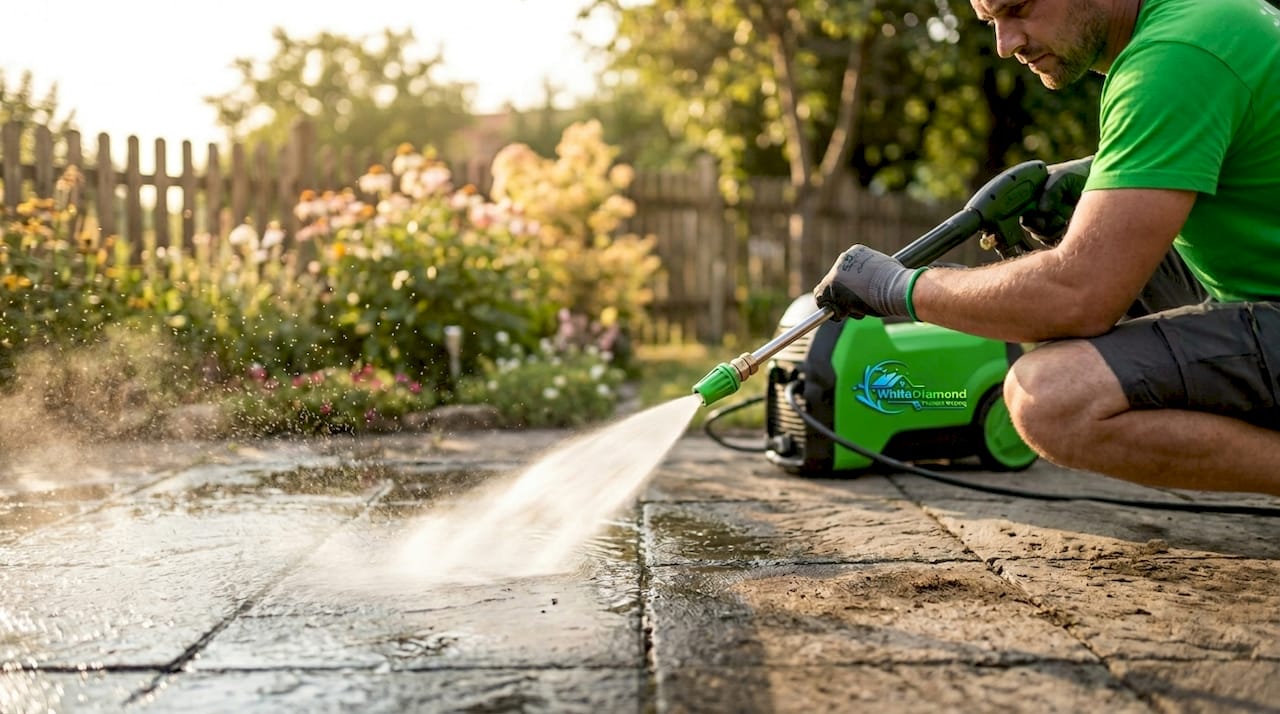
Pressure washing
Pressure washing is the most widely used paver cleaning method. The key is staying within the correct range. Use 1,200 to 1,800 PSI with a wide-angle nozzle set between 25 and 40 degrees. Keep the wand at least 12 inches from the surface. This combination removes grime without eroding joint sand or etching the paver face. Going above that PSI range, or using a narrow zero-degree nozzle, strips joint sand and damages the surface texture.
Chemical and biological cleaners
Enzymatic and biological cleaners are underused by homeowners but highly effective. Diluted vinegar or enzymatic solutions kill moss and algae at the root level, which makes physical removal far easier and more complete. Oxygen bleach works well on organic stains without damaging the paver color. Mild dish soap handles light grease. The key is letting the solution dwell on the surface for 10 to 15 minutes before scrubbing or rinsing.
Manual scrubbing
A stiff-bristle nylon brush works well for spot cleaning and stubborn stains. Manual scrubbing paired with a biological cleaner is often more effective than pressure washing alone for organic growth. This approach is also safer for older or more delicate pavers that cannot handle high water pressure.
Here is a quick reference for matching method to situation:
- Light dirt and dust: Sweep, then rinse with a garden hose or low-pressure wash
- Algae, moss, or mold: Apply enzymatic or oxygen bleach cleaner, dwell 10 to 15 minutes, scrub, then rinse
- Oil or grease stains: Apply dish soap or a degreaser, scrub with a nylon brush, rinse thoroughly
- Heavy buildup or old sealer: Pressure wash at 1,200 to 1,800 PSI with a 25 to 40 degree nozzle, then follow with a chemical cleaner if needed
- Full surface restoration: Combine chemical treatment and pressure washing, then re-sand joints and seal
Pro Tip: Two gentler cleaning passes with a cleaning agent produce better results than one aggressive pressure wash. You protect the joint sand and avoid surface etching while still getting a thorough clean.
How to clean pavers step-by-step
Follow this sequence whether you are doing the work yourself or evaluating what a professional should be doing on your property.
-
Clear the area. Remove all furniture, planters, and decorative items. Sweep the entire surface with a stiff broom to remove loose debris, leaves, and dirt. Pull any visible weeds from the joints by hand.
-
Pre-wet the surface. Lightly rinse the pavers with a garden hose. This prevents the cleaning solution from drying too quickly and helps it penetrate more evenly.
-
Apply your cleaning solution. Choose the right cleaner for your stain type (see the method guide above). Apply it evenly across the surface and let it dwell for 10 to 15 minutes. Do not let it dry completely before the next step.
-
Scrub or pressure wash. For manual cleaning, use a stiff nylon brush in circular motions. For pressure washing, maintain 1,200 to 1,800 PSI and keep the nozzle at a consistent distance. Work in sections and overlap slightly to avoid streaking.
-
Rinse thoroughly. Flush the entire surface with clean water. Make sure no cleaning solution residue remains, as leftover chemicals can interfere with sealer adhesion or discolor the pavers.
-
Inspect and re-sand the joints. Cleaning often displaces polymeric joint sand. Once the surface is dry, sweep fresh polymeric sand into the joints and compact it lightly. Skipping this step leaves joints vulnerable to weed growth and paver shifting.
-
Allow full drying before sealing. Wait at least 24 to 48 hours before applying any sealer. In humid climates like Citrus County, Florida, allow extra drying time to avoid trapping moisture under the sealer.
Spring and early summer are the best times to schedule a full cleaning. Temperatures are moderate, rain is manageable, and the surface has time to dry and cure before heavy summer use.
Pro Tip: Wear safety glasses and chemical-resistant gloves when working with any cleaning solution, including oxygen bleach or enzymatic cleaners. Even mild solutions can irritate skin and eyes on prolonged contact.
Common mistakes to avoid when cleaning pavers
Most paver damage from cleaning is preventable. The errors below are the ones that show up repeatedly, and each one carries a real cost in repairs or redone work.
- Using too much pressure or the wrong nozzle. High pressure or narrow nozzles erode joint sand and etch the paver surface, which leads to instability and expensive repairs. Always stay within the 1,200 to 1,800 PSI range.
- Sealing without cleaning first. Applying sealer over dirt, algae, or moisture causes peeling and uneven coverage. The sealer fails faster than it should, and you end up stripping and reapplying within a year.
- Using wire brushes. Wire bristles scratch and score paver surfaces, leaving permanent marks. Always use nylon or natural fiber brushes.
- Ignoring organic growth until it spreads. Algae and moss hold moisture against the paver surface. Organic growth causes pavers to absorb moisture and UV damage, accelerating premature deterioration. Address it early.
- Skipping joint sand replacement. After cleaning, joints need fresh polymeric sand. Without it, weeds establish quickly and pavers begin to shift.
For a deeper look at what goes wrong during DIY pressure washing, the pressure washing mistakes guide from Whitediamondpressurewashing covers the most common errors homeowners make and how to avoid them.
Regular sweeping, prompt spot cleaning, and annual inspections are the simplest ways to extend the time between full cleans. Pavers that are swept weekly and spot-treated as needed stay cleaner longer and require less aggressive cleaning when the full cycle comes around.
How often should you clean pavers?
The industry standard for paver cleaning is every 1 to 2 years, with sealing every 2 to 4 years depending on traffic levels and local climate conditions. These are baselines, not fixed rules. Your specific situation may require more frequent attention.
| Factor | Effect on cleaning frequency |
|---|---|
| Shaded or moist areas | More frequent cleaning needed; algae and moss grow faster |
| High foot or vehicle traffic | Annual cleaning recommended to manage staining and wear |
| Humid or high-rainfall climate | Organic growth accelerates; inspect every 6 to 12 months |
| Sealed pavers in good condition | Contaminants release more easily; cleaning intervals can extend |
| Older or unsealed pavers | Absorb stains faster; clean more frequently and seal promptly |
The clearest signs that cleaning is overdue include visible algae or moss growth, dark staining that does not sweep away, peeling or discolored sealer, and pavers that look dull or uneven in color. Addressing these signs early keeps the job manageable. Waiting until growth is heavy or stains are deeply set means more aggressive cleaning, which carries a higher risk of surface damage. Consistent maintenance also pays off in curb appeal and property value. A well-maintained driveway or patio signals care to buyers, neighbors, and guests alike. The driveway maintenance checklist from Whitediamondpressurewashing is a practical resource for building a year-round maintenance routine.
Key takeaways
Paver cleaning is a non-negotiable maintenance step that protects surface integrity, extends paver lifespan, and makes sealing effective rather than harmful.
| Point | Details |
|---|---|
| Cleaning before sealing is mandatory | Sealing over dirty or wet pavers causes peeling and traps moisture, leading to sealer failure. |
| Use the right PSI range | Stay between 1,200 and 1,800 PSI with a 25 to 40 degree nozzle to avoid surface and joint damage. |
| Enzymatic cleaners outperform brute force | Biological cleaners kill moss and algae at the root, making physical removal easier and more complete. |
| Clean every 1 to 2 years | Industry guidelines recommend this interval, with more frequent cleaning in shaded or high-traffic areas. |
| Re-sand joints after every clean | Polymeric joint sand displaced during cleaning must be replaced to prevent weed growth and paver shifting. |
What I have learned from years of watching homeowners clean pavers
Most homeowners treat paver cleaning as something they do when the surface looks bad enough to bother them. That is the wrong trigger. By the time algae is visible and stains are set, the cleaning job is already harder than it needed to be, and the risk of damage from aggressive cleaning goes up significantly.
The biggest misconception I see is that a pressure washer solves everything. It does not. A pressure washer is a tool, and like any tool, it causes damage when used incorrectly. I have seen driveways stripped of joint sand in a single afternoon because someone used a zero-degree nozzle at full pressure. Refilling and compacting joint sand is not a quick fix. It takes time and money that could have been avoided entirely.
What actually works is the combination approach: a biological or enzymatic cleaner applied first, a dwell period, then a controlled pressure wash at the right PSI. That sequence does more with less force and leaves the surface in better condition. It also means the sealer you apply afterward bonds properly and lasts the full 2 to 4 years it should.
If you are managing multiple properties or a large paved area, professional cleaning is worth the investment. Not because DIY is impossible, but because the equipment, technique, and product knowledge that professionals bring consistently produce better results with less risk of damage. The role of water pressure in safe exterior cleaning is more nuanced than most people expect, and getting it wrong is expensive.
— Bobby
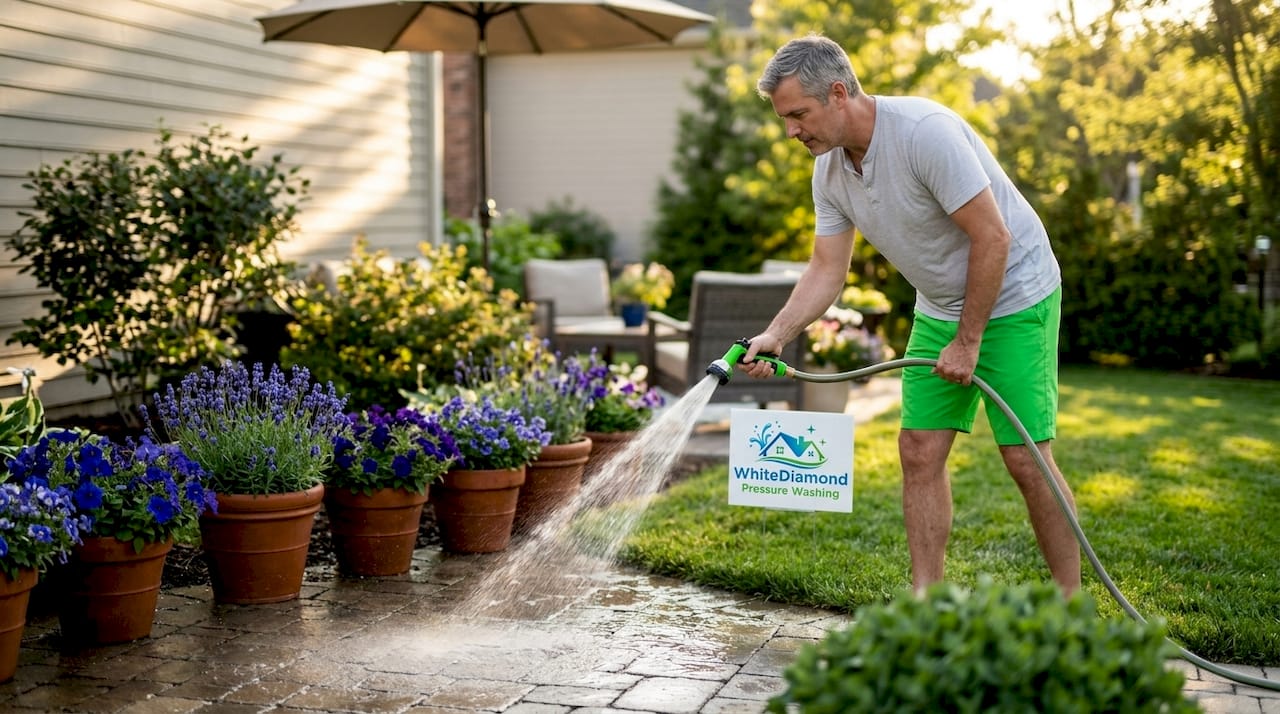
Let Whitediamondpressurewashing handle your paver cleaning
Whitediamondpressurewashing specializes in safe, effective paver cleaning for homeowners and property managers across Citrus County and surrounding areas. The team uses low-pressure techniques and eco-friendly cleaning solutions that remove contaminants without damaging joint sand or paver surfaces.

Skipping professional cleaning costs more in the long run through damaged pavers, failed sealers, and accelerated wear. Whitediamondpressurewashing takes the guesswork out of the process, from choosing the right cleaner to re-sanding joints and preparing surfaces for sealing. Visit the services page to see the full range of exterior cleaning options, or go directly to Whitediamondpressurewashing to book your free estimate today.
FAQ
What does paver cleaning remove?
Paver cleaning removes dirt, algae, mold, efflorescence, oil stains, and old sealer residue from the surface and joints of paved areas. It acts as the necessary prep step before re-sanding or applying a fresh sealer coat.
How often should pavers be cleaned?
Industry guidelines recommend cleaning pavers every 1 to 2 years and sealing every 2 to 4 years. Shaded, moist, or high-traffic areas may need attention more frequently.
Can I pressure wash pavers myself?
Yes, but use 1,200 to 1,800 PSI with a 25 to 40 degree wide-angle nozzle and keep the wand at least 12 inches from the surface. Narrow nozzles or excessive pressure erode joint sand and etch the paver face, causing costly damage.
Do I need to clean pavers before sealing?
Sealing must only go on a clean, dry surface. Sealing over contaminants causes peeling, uneven coverage, and traps moisture that accelerates paver deterioration.
What is the best cleaner for pavers?
Enzymatic or biological cleaners are the most effective for organic growth like moss and algae. Oxygen bleach handles organic stains without fading color, and mild dish soap works for light grease. Avoid wire brushes and harsh acid-based cleaners on standard concrete or brick pavers.