

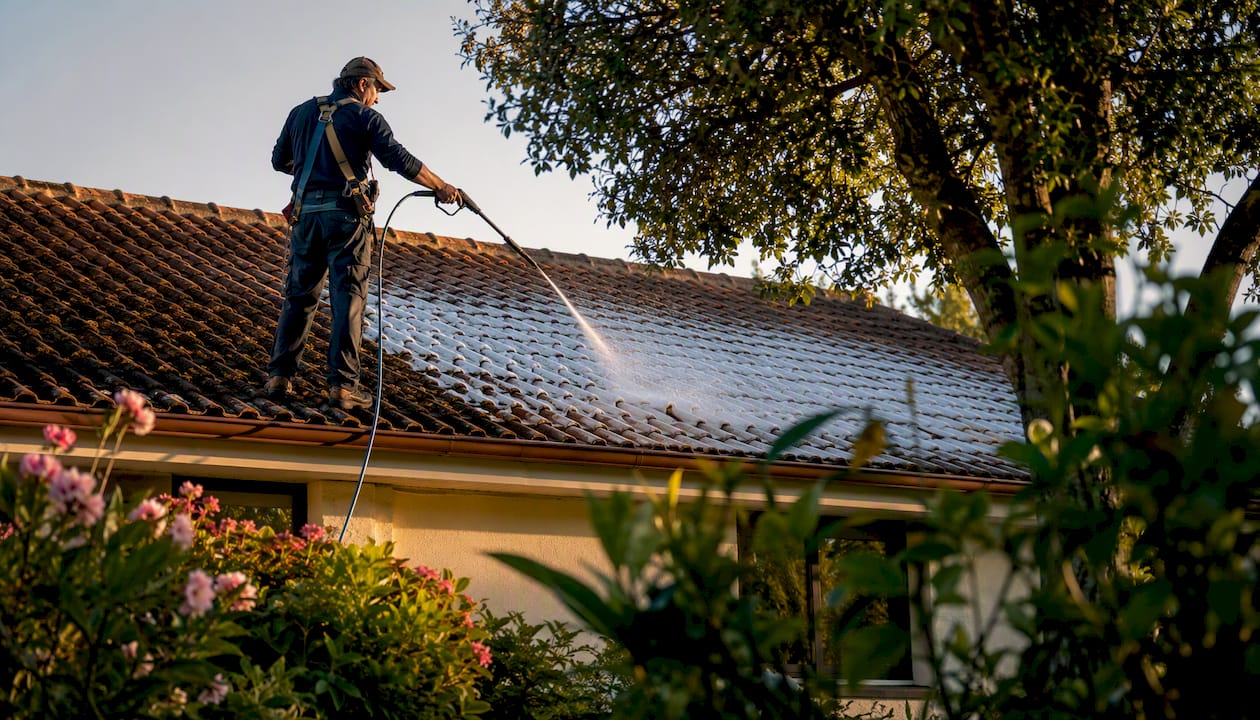
Soft washing is the right method for most clay and concrete tile roofs, and for the majority of homeowners with intact tiles and visible biological growth, it beats pressure washing on every measure that matters: material safety, longevity of results, and manufacturer compliance. That said, if your roof is steep, multi-story, or covered in thick moss and lichen, or if you don’t own fall-protection gear, hire a professional. The National Roof Cleaning Authority recommends inspection and test patches before any chemical application, and Whitediamondpressurewashing carries full insurance and performs insured soft-wash service throughout Citrus County and surrounding areas.
The short version: single-story, low-pitch roof with light algae staining? You can likely do this yourself with the right equipment and chemistry. Anything more complex than that, call a pro.
Key Takeaways
Soft washing is the recommended method for tile roofs because it kills biological growth at the spore level, protecting tile integrity and producing results that last years longer than pressure washing.
| Point | Details |
|---|---|
| Soft wash beats pressure washing | Chemistry kills spores for 2–5 years of reduced regrowth; pressure washing often leaves spores and can damage mortar. |
| Match concentration to tile type | Concrete tile needs 3–6% sodium hypochlorite; glazed clay needs 1–3% to avoid permanent surface whitening. |
| Dwell time is non-negotiable | Allow sufficient dwell time depending on tile type and growth severity; rinsing early leaves live spores behind. |
| Know when to hire a pro | Steep pitch, multi-story height, heavy lichen, or no fall-protection gear means call a professional. |
| Whitediamondpressurewashing | Offers insured, tile-specific soft-wash service in Citrus County with test patches and before/after documentation included. |
Table of Contents
- What is soft washing and how does it work on a tile roof?
- Why soft washing is better for tile roofs than pressure washing
- Is soft washing safe for tile roofs? Manufacturer guidance and environmental precautions
- How to soft wash a tile roof: step-by-step from prep to cleanup
- How tile type changes your approach: clay, concrete, and glazed surfaces
- What equipment and chemicals do you need for a safe soft wash?
- DIY vs hiring a professional: how to decide and what to ask
- Common mistakes, how to fix them, and how to prevent regrowth
- How Whitediamondpressurewashing performs tile roof soft-wash jobs
- Why soft washing tile roofs is the only approach worth defending
- Get a professional tile roof soft-wash estimate from Whitediamondpressurewashing
- Sources
What is soft washing and how does it work on a tile roof?
Soft washing applies a low-pressure chemical treatment that kills biological growth rather than blasting it off mechanically. The active ingredient, typically sodium hypochlorite or hydrogen peroxide, penetrates algae, moss, lichen, and mold at the cellular level. A surfactant helps the solution cling to vertical and curved tile surfaces long enough to do its job. Then a low-pressure rinse clears the dead material away.
The key distinction from pressure washing is where the work happens. Pressure washing relies on physical force. Soft washing relies on chemistry and time.
Here is how the process actually works:
- Chemical action: Sodium hypochlorite (the active ingredient) breaks down the cell walls of algae, moss, and lichen. The surfactant keeps the solution from running off before it can penetrate.
- Dwell time: The solution needs to sit on the surface, typically 10–20 minutes depending on the tile type and severity of growth. Rushing this step is the single most common reason for poor results.
- Low pressure matters for tiles: Application pressures below 300 PSI protect tile coatings, ridge mortar, and underlap areas that high-pressure water can damage or displace.
Why soft washing is better for tile roofs than pressure washing
Soft washing usually preserves tile integrity and kills spores for longer-lasting results. That is not just a preference — it reflects how tile roofs are constructed and what actually damages them.
Pressure washing removes the visible green or black layer, but it often leaves spores behind. Those spores regrow sometimes within a couple of years. Correctly applied soft-wash chemistry kills the spores themselves, which is why professionals report 2–5 years of reduced regrowth after a properly specified job. That gap in longevity matters when you factor in the tile cleaning cost over time.
The structural risks of pressure washing on tile are well documented. Multiple industry sources and manufacturer guidance warn that high-pressure washing risks surface erosion, displaced mortar, water forced under tile laps, and voided manufacturer warranties. Ridge mortar is especially vulnerable. Once it cracks or loosens, water ingress follows.
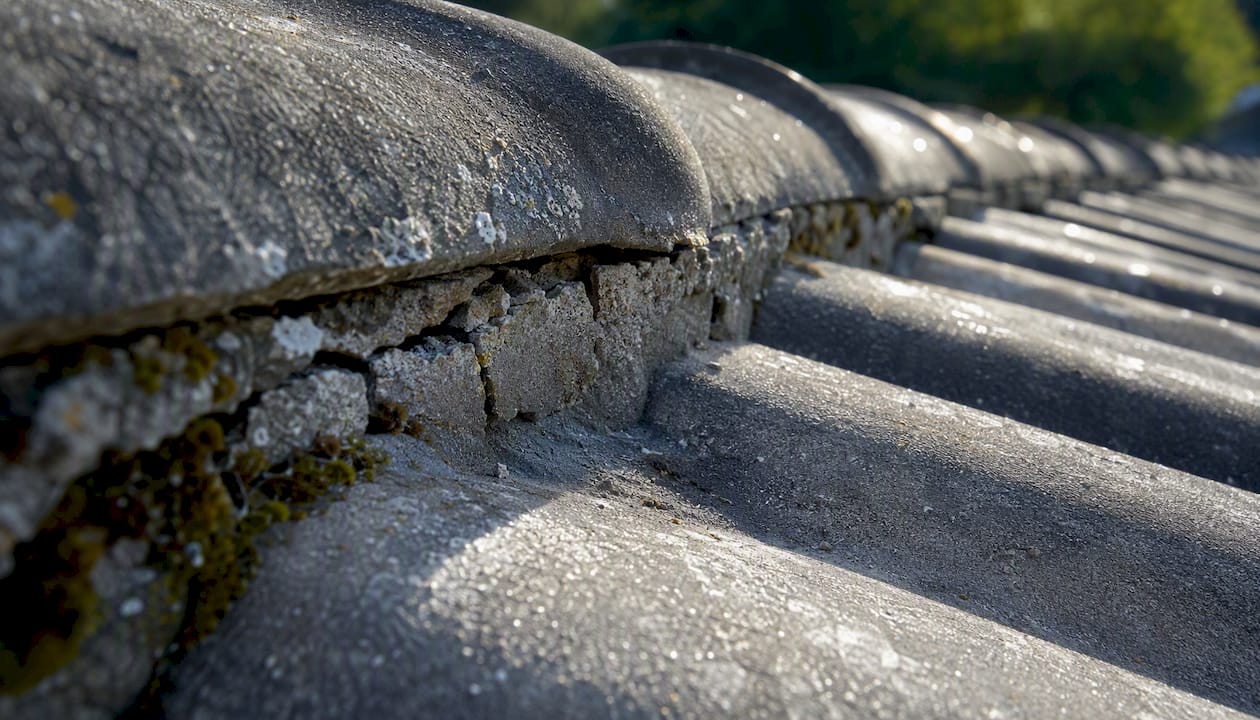
Where pressure rinsing fits in: A low-pressure rinse (under 300 PSI) is used at the end of a soft-wash job to clear dead biological material. That is different from using a pressure washer as the primary cleaning method. Experienced pros sometimes use a careful, low-pressure post-rinse on concrete tiles with heavy buildup, but never as a substitute for the chemical treatment.
The advantages of low-pressure washing over high-pressure methods are especially pronounced on older tile, glazed surfaces, and any roof where the ridge mortar shows signs of age.
Is soft washing safe for tile roofs? Manufacturer guidance and environmental precautions
Yes, when properly specified. The chemistry is safe for most tile types when concentrations are matched to the material, dwell times are controlled, and runoff is managed. The risks come from getting those variables wrong.
Before you start, check these:
- Review your tile manufacturer’s care and warranty documentation. Many explicitly warn against high-pressure washing and specify acceptable cleaning methods.
- Inspect the roof for cracked, loose, or brittle tiles before applying any chemistry. Damaged tiles can allow solution to penetrate the underlayment.
- Check ridge mortar condition. Soft mortar should be repaired before cleaning, not after.
- Use a roof inspection checklist to document existing damage so you are not blamed for pre-existing issues.
Environmental precautions:
- Pre-soak all landscaping within 10 feet of the roofline before application and rinse again after.
- Cover or bag any plants directly below downspouts.
- Clear gutters before you start so runoff flows freely. Blocked gutters concentrate chemical solution around foundations. Gutter maintenance before a roof cleaning job is not optional.
- Follow the product label for dilution and disposal. Sodium hypochlorite breaks down quickly in sunlight, but concentrated runoff can harm aquatic life in storm drains.
Safety checklist for anyone going on the roof:
- Use a harness and anchor system rated for roofwork. Falls are the leading cause of serious injury in residential roof cleaning.
- Never walk on glazed clay tiles. They are slippery when wet and can crack under point-load pressure.
- Wear chemical-resistant gloves, eye protection, and a respirator when mixing concentrated hypochlorite.
- Review roof washing safety tips before attempting any work above single-story height.
How to soft wash a tile roof: step-by-step from prep to cleanup
Follow this sequence and you minimize risk while getting effective biological control. Skipping steps, especially the test patch and the pre-soak, is where most DIY jobs go wrong.
Preparation
- Inspect the roof from the ground using binoculars. Note cracked tiles, loose ridge mortar, and areas of heavy growth.
- Clear gutters and downspouts completely.
- Pre-soak all landscaping, shrubs, and grass within the splash zone.
- Cover any HVAC intakes, skylights, or painted trim that could be affected by overspray.
- Choose a day with no rain forecast for at least 4 hours after application. Rain dilutes the solution before dwell time completes.
Application
- Set up your soft-wash pump or low-pressure sprayer at ground level. Never carry a full chemical tank onto the roof.
- Run a test patch on an inconspicuous tile section. Apply solution, wait the full dwell time, and rinse. Check for whitening, color change, or surface etching before proceeding.
- Apply solution from the ridge down, working in sections. Keep the surface wet throughout the dwell period. Do not let it dry on the tile.
- Allow 10–15 minutes of dwell time for most tile types. Florida-focused guidance recommends this range for sodium hypochlorite at 3–6% active chlorine with surfactant.
- Rinse with low-pressure water (under 300 PSI), working from ridge to eave.
Cleanup
- Rinse all landscaping again immediately after the roof rinse.
- Flush gutters and downspouts with clean water.
- Check downspout discharge areas for chemical pooling.
- Photograph the finished roof for documentation.
Mix ratio reference and dwell times
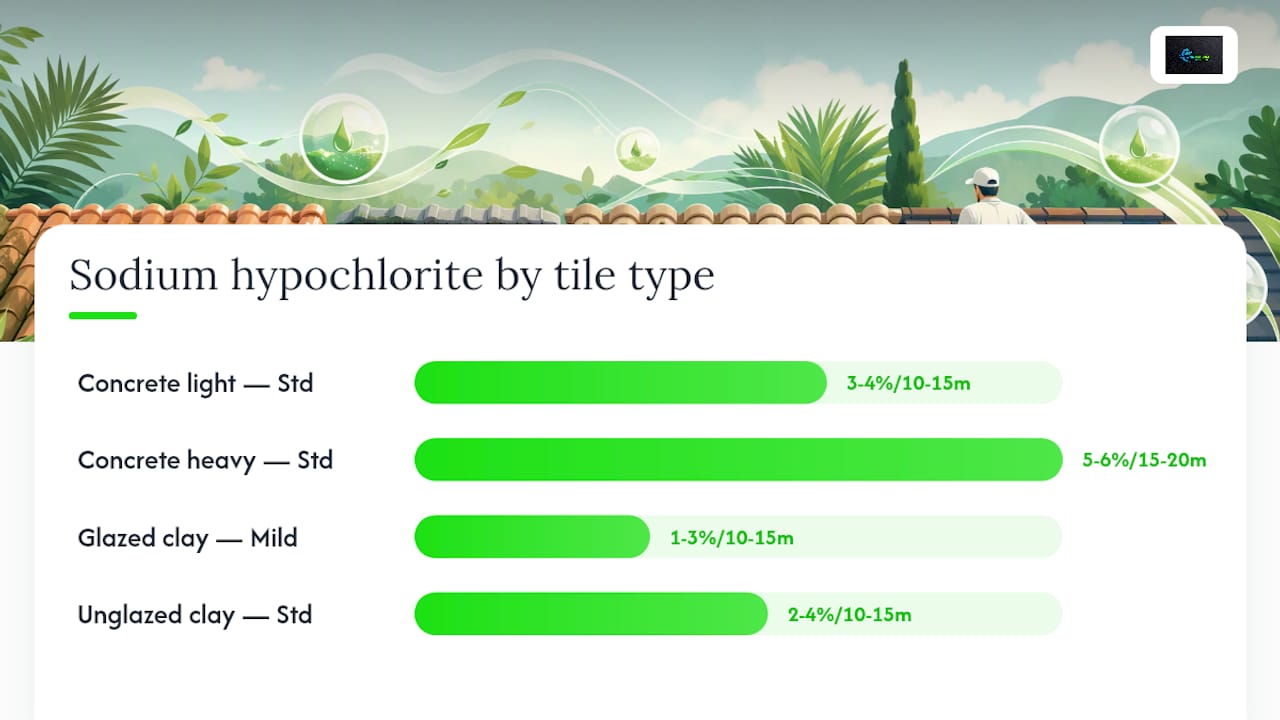
| Tile type | Sodium hypochlorite (active chlorine) | Surfactant | Dwell time |
|---|---|---|---|
| Concrete tile (light staining) | 3–4% | Standard soft-wash surfactant | 10–15 min |
| Concrete tile (heavy growth) | 5–6% | Standard soft-wash surfactant | 15–20 min |
| Glazed clay tile | 1–3% | Mild surfactant | 10–15 min |
| Unglazed clay tile | 2–4% | Standard soft-wash surfactant | 10–15 min |
Pro Tip: Run your test patch at least 24 hours before the full job when working on glazed or older tiles. Some reactions, particularly sealer whitening, take time to appear. A same-day test patch can give you a false green light.
How tile type changes your approach: clay, concrete, and glazed surfaces
Concrete tile is more porous and typically needs a higher concentration and longer dwell time than glazed clay. Practitioners confirm that test patches and visual inspection are standard professional practice before full application, precisely because the difference between tile types is not always obvious from the ground.
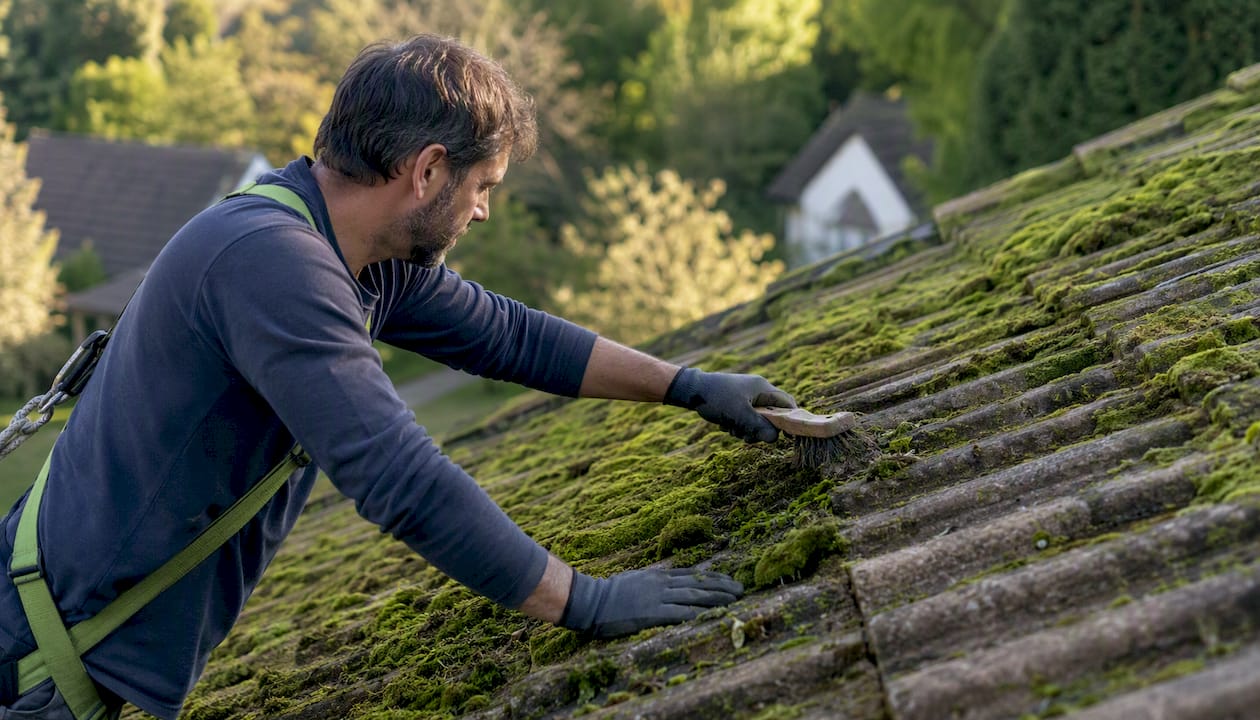
Concrete tile absorbs solution readily, which is an advantage for penetration but also means runoff happens faster on steep pitches. On heavily infested concrete tiles, a staged approach often works better: manually remove bulk moss first, then apply soft-wash chemistry. Trying to chemically dissolve a thick moss mat in one pass often requires concentrations that risk surface damage.
Glazed clay tile has a fired, sealed surface that resists absorption. That is good for the tile but means the chemistry sits on the surface rather than penetrating. The glaze can whiten or cloud if you use too strong a mix, and that damage is permanent.
Unglazed clay (Spanish or mission tile) sits between the two. It is more porous than glazed but less so than concrete.
Mortar and ridge areas need special attention regardless of tile type. Soft mortar absorbs solution and can weaken further if concentrations are too high. Apply carefully around ridge caps and hip tiles, and inspect mortar condition after rinsing.
| Tile type | Concentration range | Dwell time | Key caution |
|---|---|---|---|
| Concrete tile | 3–6% active chlorine | 10–20 min | Stage removal on heavy moss |
| Glazed clay | 1–3% active chlorine | 10–15 min | Risk of glaze whitening at high concentrations |
| Unglazed clay | 2–4% active chlorine | 10–15 min | Test patch on older tiles |
| Ridge mortar | Use lower end of tile range | 10 min max | Inspect for softening after rinse |
- Always run a test patch before full application on any tile type you haven’t cleaned before.
- On older or reclaimed tiles, start at the lowest concentration in the range and work up only if needed.
- Document the test patch result with photos before proceeding.
What equipment and chemicals do you need for a safe soft wash?
Use low-pressure application equipment, not a high-pressure power washer, and wear correct PPE throughout. That is the non-negotiable starting point.
Equipment:
- Low-pressure soft-wash pump system (purpose-built for chemical application at under 300 PSI) or a quality pump sprayer with an extension wand for smaller jobs
- Chemical-resistant hoses rated for sodium hypochlorite
- Extension poles or downstream injection systems to reach the ridge from a ladder or the ground
- Ladders with roof-safe standoff brackets to avoid resting against gutters or tile edges
- Harness and anchor system for any roof work above single-story height
Chemicals:
Pair it with a quality soft-wash surfactant, not dish soap or household detergent, which can leave residue and attract dirt. Biodegradable soft-wash blends are available and preferred when runoff into landscaping or storm drains is a concern.
Avoid these:
- Straight household bleach (typically 3–6% sodium hypochlorite but with additives that can damage tile sealers and are not formulated for roof use)
- Acid cleaners (muriatic acid or similar), which etch tile surfaces and corrode metal flashing
- Abrasive tools or wire brushes, which scratch glazed surfaces permanently
PPE:
- Chemical-resistant nitrile or neoprene gloves
- Safety glasses or goggles (not just sunglasses)
- Respirator rated for chlorine vapors when mixing concentrated hypochlorite
- Chemical-resistant boots or shoe covers
- Long sleeves and pants to protect skin from splash
A statistic worth knowing: professional soft-wash systems typically apply solution at low pressure. Standard pressure washers operate at much higher pressure. That gap explains why the equipment category matters, not just the technique.
DIY vs hiring a professional: how to decide and what to ask
DIY is reasonable for single-story, low-pitch roofs with light algae or moss staining and safe ladder access. If your roof has any of the following, hire a professional: steep pitch (above 4:12 is where most homeowners should stop), multi-story height, heavy lichen or thick moss mats, complex rooflines with multiple valleys, or any tile that looks brittle or cracked. Steep, high, or heavily contaminated roofs should be left to professionals with proper fall protection and equipment.
Contractor vetting checklist:
- Proof of general liability insurance and workers’ compensation
- Experience specifically with tile roofs (ask for before/after photos of tile jobs)
- Written description of their fall-protection practices
- Equipment list (confirm they use soft-wash systems, not pressure washers)
- Safety Data Sheets (SDS, formerly MSDS) for every chemical they plan to use
- References from tile roof jobs in your area
Questions to ask before booking:
- What concentration of sodium hypochlorite do you use, and how do you adjust it for tile type?
- Do you run a test patch before full application?
- How do you protect landscaping and downspout discharge?
- What is your fall-protection setup?
- Are you licensed and insured in this state?
Pricing signals: Tile roof soft washing is typically priced by roof area (square footage), adjusted for pitch complexity and growth severity. A price that seems significantly below market usually signals corner-cutting on insurance, chemical quality, or safety equipment. Use this contractor evaluation guide to vet bids before committing.
Red flags: No insurance documentation, refusal to provide SDS sheets, insistence on using a pressure washer as the primary method, or no mention of a test patch. Any one of these is a reason to walk away.
Common mistakes, how to fix them, and how to prevent regrowth
Most soft-wash failures come from wrong concentration, insufficient dwell time, or skipped inspection steps. The fix is almost always going back to basics.
Common mistakes:
- Over-pressuring: Using a pressure washer instead of a soft-wash system, or rinsing too aggressively. This removes dead material but can crack tiles, displace mortar, and force water under laps.
- Straight household bleach: Not formulated for roof use, often contains additives that leave residue or damage sealers.
- Skipping landscaping protection: Sodium hypochlorite runoff can kill grass and shrubs quickly. Pre-soaking and post-rinsing are not optional steps.
- Walking on tiles: Especially glazed clay. Point-load pressure from a boot can crack tiles that look intact from below.
- Insufficient dwell time: Rinsing too early leaves live spores on the surface. The biological material may look dead but regrows within months.
Fixes:
If you see streaking after a job, the most common cause is uneven application or early rinsing. A second, careful application with full dwell time usually resolves it. Persistent lichen (the crusty orange or gray patches) often requires manual loosening before chemistry can penetrate. Do not try to blast it off with pressure.
Maintenance timeline and regrowth prevention:
In humid climates like Florida, plan for a cleaning cycle of 1–3 years. Drier climates may stretch to 3–4 years. Results from correctly applied soft-wash commonly last multiple years because the chemistry kills spores rather than just removing visible growth. Monitor the north-facing sections of your roof first; those areas stay damp longer and show regrowth earliest.
A short post-cleaning inspection 30–60 days after the job helps catch any missed patches before they establish. Pair roof cleaning with regular roof maintenance to extend the interval between full cleanings.
How Whitediamondpressurewashing performs tile roof soft-wash jobs
Whitediamondpressurewashing follows a structured workflow on every tile roof job: inspection, test patch, containment setup, chemical application, controlled low-pressure rinse, and final inspection. No step gets skipped because each one protects both the roof and the homeowner.
The process starts with a ground-level and close-up inspection to document existing tile condition, mortar integrity, and growth severity. A test patch goes on before any full application, and the results are photographed. Landscaping is pre-soaked and covered where needed. Chemical concentrations are matched to the tile type, and dwell times are timed, not estimated. The rinse stays under 300 PSI.
Every job is fully insured, follows industry best-practice guidance for professional soft-wash work, and includes before/after documentation that homeowners can keep for their records. For homeowners who want a follow-up check, that can be arranged as part of the service scope.
To get an estimate, contact Whitediamondpressurewashing through the website. You’ll receive a scope of work, a timeline, and a clear explanation of the chemistry being used before any work begins.
Why soft washing tile roofs is the only approach worth defending
There is a version of this conversation where someone argues that a good pressure washer operator can clean a tile roof safely. They are not entirely wrong. A skilled operator at controlled pressure, with the right nozzle, can remove visible growth without immediately cracking tiles. The problem is what that approach leaves behind: live spores, weakened mortar joints, and a roof that looks clean for 12–18 months before the algae comes back darker than before.
Soft washing is not a gentler version of pressure washing. It is a different method with a different mechanism. The chemistry does the work; the water just delivers and rinses. That distinction matters most on tile because tile roofs are not monolithic slabs. They are interlocking systems with mortar, underlayment, and laps that high-pressure water can compromise in ways that don’t show up until the next heavy rain.
The homeowners who push back on soft washing usually do so because they’ve seen a pressure-washed roof look great right after the job. They haven’t seen the same roof two years later, or the repair bill for re-mortaring ridge caps that got blasted loose. The soft wash roof cleaning benefits are not theoretical. They show up in how long the results last and what doesn’t need replacing afterward.
Get a professional tile roof soft-wash estimate from Whitediamondpressurewashing
Whitediamondpressurewashing brings insured crews, purpose-built soft-wash equipment, and tile-specific chemical protocols to every job in Citrus County and surrounding areas. The difference from a generic pressure washing company: every tile roof gets a test patch, landscaping protection is standard, and you receive before/after documentation at no extra cost.
Getting started is straightforward. Visit the services page to see the full list of exterior cleaning offerings, or go directly to the soft-wash process overview to see exactly how a job is scoped and executed. When you’re ready, request a free estimate through the website. You’ll get a clear scope, a timeline, and confirmation of insurance and chemical SDS before any crew arrives on your property.
Sources
These are the primary references used throughout this article. They support the concentration ranges, dwell times, safety guidance, and method comparisons covered above.
- Tile Roof Cleaning: Clay, Concrete, and Spanish Tile Best Practices | National Roof Cleaning Authority
- How to Safely Clean a Tile Roof in Florida
- Softwash vs Pressure Washing — The Complete Roof Cleaning Comparison | Apex Softwash
- Softwashing Roof Tiles vs Pressure Washing: UK Guide – SoftWash UK Ltd
- How to soft-wash a roof — countyroofingsystems blog
Recommended
- Effective Roof Cleaning Techniques for Homeowners – white-diamond-pressure
- Soft Washing Process Explained: A Step-by-Step Guide for Safety – white-diamond-pressure
- Low-pressure roof washing: safe results for your home – white-diamond-pressure
- 7 Practical Examples of Soft Washing for Homeowners – white-diamond-pressure