

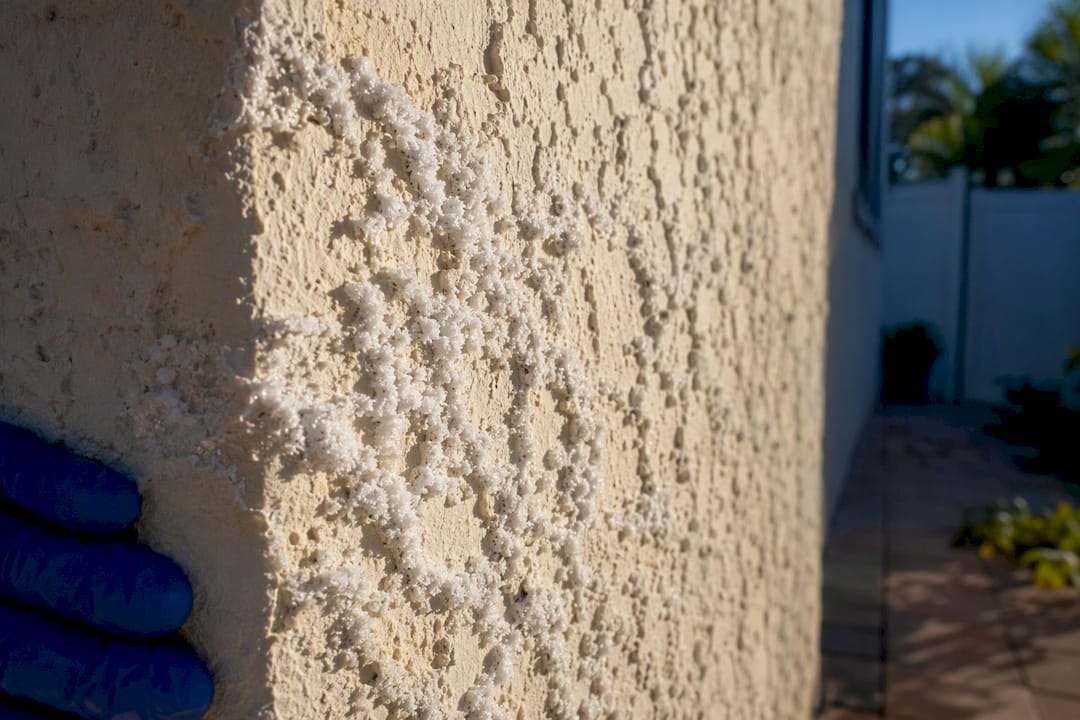
Efflorescence is the powdery white or gray deposit left behind when water pulls salts out of stucco and evaporates on the surface. Start with dry brushing followed by a plain water rinse. Do not reach for a pressure washer or an untested chemical first; both can etch the finish or drive salts deeper. If the staining comes back within a few weeks, that is your cue to look for a moisture problem, not a cleaning problem.
TL;DR:
- Efflorescence mostly recurs if moisture problems are not addressed, with deposits reappearing at the same spots within 30 days indicating ongoing water infiltration.
- Avoid high-pressure washing and untested chemicals, as they can damage stucco or push salts deeper, while gentle dry brushing and water rinses resolve most primary efflorescence.
- When deposits resist vinegar or mild detergent, commercial masonry cleaners are the next step, with diluted muriatic acid as a last resort after proper testing and neutralization.
- Recurring efflorescence often signals underlying moisture issues, such as leaks or poorly sealed joints, rather than just surface stains, requiring inspection and repair of drainage and sealant details.
- Proper preventative measures include maintaining gutters, inspecting flashing, resealing joints, and ensuring weep screeds are clear to prevent water entry and subsequent salt deposits.
Table of Contents
- What Is Efflorescence Removal on Stucco, and Where Do You Start?
- Tools, Supplies, and What to Try First
- Step-by-Step Removal: From Gentle to Aggressive
- Safety and Testing Rules You Cannot Skip
- When Efflorescence Signals a Bigger Moisture Problem
- Preventing Efflorescence From Coming Back
- What Years of Stucco Cleanup Jobs Actually Teach You
- Let a Soft-Wash Professional Handle the Hard Calls
- Where This Guidance Comes From
- Sources
- FAQ
What Is Efflorescence Removal on Stucco, and Where Do You Start?
Efflorescence forms when water moves through cement-based material, dissolves naturally occurring salts, and carries them to the surface where the water evaporates and the salts crystallize. The Stucco Manufacturers Association describes it as a crystalline deposit that shows up most often on new stucco (called primary efflorescence, tied to curing) or on older walls with a chronic moisture path (secondary efflorescence, the kind that keeps coming back).
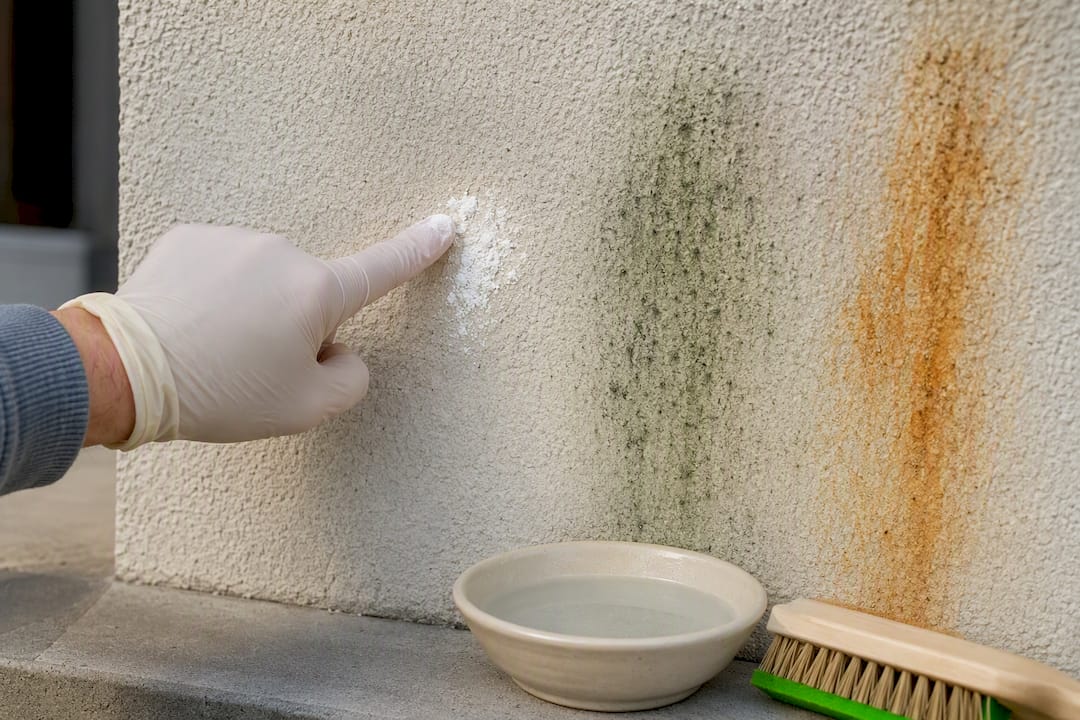
You can tell efflorescence apart from other stucco stains fairly easily. Rub it with a damp finger. If it smudges into a chalky, whitish residue and dissolves a little in water, it is efflorescence. Mold or mildew looks greenish or black and doesn’t dissolve the same way. Rust streaks from a nail or metal lath have an orange or brown tint. Efflorescence is almost always flat, dry, and powdery to the touch, at least until it gets wet again.
Tools, Supplies, and What to Try First
Before touching the wall, gather a basic kit. Most homeowners already own most of it.
- A stiff-bristle brush (nylon, not wire, to avoid scratching acrylic finishes), and a soft brush for lighter buildup.
- A garden hose with a spray nozzle or a low-pressure pump sprayer for rinsing.
- Rubber gloves and eye protection, even for the mild mixes.
- A bucket for mixing a mild detergent solution or a diluted white vinegar wash, roughly one part vinegar to five or ten parts water as a starting point.
- A small, hidden test patch, ideally a few square feet in a corner or behind a shrub.
Run through a quick sequence before you commit to the whole wall: test the patch, dry brush the area, rinse with clean water, then wait and reassess once it dries. Plenty of light efflorescence disappears at this stage with no chemicals at all.
Step-by-Step Removal: From Gentle to Aggressive
Work through these stages in order. Skipping ahead to acid because a wall “looks bad” is the single most common way people damage a stucco finish that a garden hose would have fixed.
- Dry brush and rinse. Brush the deposit off dry first; wetting it before brushing can dissolve the salts back into the wall and reactivate them later. Once loosened, flush with clean water from the top down, letting gravity carry the residue off the surface. This step alone resolves most primary efflorescence on new stucco.
- Mild detergent or vinegar wash. If dry brushing leaves a haze, mix a mild dish detergent in water, or try diluted white vinegar at roughly 1:5 to 1:10 vinegar-to-water. Apply with a soft brush, let it sit for 5 to 10 minutes, agitate gently, then rinse thoroughly. Vinegar’s mild acidity dissolves calcium and lime deposits without the risk profile of a stronger acid.
- Commercial efflorescence or masonry cleaner. For deposits that survive vinegar, a commercial cleaner made for concrete and masonry surfaces is the next step. Behr recommends starting with mechanical removal, then applying a concrete/masonry cleaner and etcher exactly per label directions, always on a test patch first, followed by a full rinse.
- Diluted muriatic acid, only as a last resort. For heavy, stubborn deposits, some industry guidance outlines a controlled acid wash: pre-wet the stucco with plain water, apply a strongly diluted muriatic (hydrochloric) acid solution mixed to the manufacturer’s specified ratio, then immediately neutralize with an alkaline wash before rinsing thoroughly. The SMA’s technical paper treats acid as the final option, not a default, and every source in this workflow points back to the same rule: check the exact dilution with the stucco manufacturer before mixing anything.
Pro Tip: Never apply acid with a pressure washer or under any spray pressure. Acid needs to sit and react on the surface, and pressurizing it just drives it into hairline cracks where it keeps working long after you’ve stopped rinsing.
One industry-sourced routine for stubborn calcium carbonate deposits runs wetting, dilute acid wash, immediate alkaline neutralization, and a final rinse, in that exact order, with manufacturers named as the source to confirm dilution strength for your specific stucco system.
After cleaning, don’t expect a factory-fresh finish immediately. Acid washing and heavy scrubbing can leave subtle discoloration or a slightly different sheen where the wall was treated, especially on tinted or textured finishes. That’s normal, and it’s usually resolved with a fog coat, a light sprayed-on finish coat that blends texture and tone, or a full recoat if the area is large or highly visible.
Safety and Testing Rules You Cannot Skip
Every reputable manufacturer guide circles back to the same instruction: test first, escalate slowly.
- Apply any cleaner to a hidden patch and wait at least 24 hours before judging the result. Some reactions and discoloration take a day to fully show.
- Keep pressure washing off the table for stucco cleanup. Sto’s cleaning specifications set pressure limits specifically because techniques safe on solid substrates can tear into foam-backed EIFS or delicate acrylic finishes.
- Wear gloves and eye protection any time you’re mixing acid or a strong alkaline neutralizer, and mix acid into water, never water into acid.
- Contain and divert runoff away from plants, storm drains, and pavement whenever you’re using anything beyond plain water and mild detergent.
- If the test patch bubbles, discolors, or softens the finish, stop immediately. That’s your signal to call a stucco or soft-wash professional rather than push forward on the rest of the wall.
For anyone leaning on a power washer out of habit, it’s worth reading how low PSI settings protect stucco before turning a dial you can’t easily undo.
When Efflorescence Signals a Bigger Moisture Problem
Efflorescence that shows up once on new stucco and fades within a season is usually cosmetic. Efflorescence that keeps returning in the same spot is diagnostic information, not a cleaning failure.
Watch for these patterns:
- Deposits that reappear at the same flashing, window sill, or roofline within 30 days of cleaning.
- Interior dampness, peeling paint, or a musty smell on the wall directly behind the affected exterior area.
- Cracking, bubbling, or delamination near the stained patch.
- Staining that spreads rather than shrinks after two or three cleaning attempts.
Inspectapedia notes that recurring efflorescence typically points to an active moisture path through the wall assembly, not a surface stain you simply haven’t scrubbed hard enough. Check sealant joints, gutter alignment, and flashing details around windows and rooflines as a first pass. A moisture meter can confirm what your eyes suspect. Industry field protocols generally treat deposits covering more than 10% of a wall face, or staining that returns within a month of a proper cleaning, as the threshold for calling in a stucco contractor rather than reaching for another bucket of vinegar.
Preventing Efflorescence From Coming Back
Cleaning solves the symptom. Preventing efflorescence in stucco means fixing what let water in to begin with.
- Keep gutters clear and properly pitched so water doesn’t sheet down the wall face.
- Inspect flashing at rooflines, window heads, and weep screeds for gaps or failed caulk once a year.
- Reseal control joints and penetrations (pipes, vents, fixtures) with a flexible sealant rated for exterior masonry.
- Confirm weep screeds at the base of the wall are clear and not buried under mulch or landscaping, which traps moisture against the stucco.
Once a wall has been cleaned and the moisture issue addressed, an acrylic or tinted primer can even out any residual staining before you decide whether a full fog coat or repaint is worth it. Time the follow-up coating for a stretch of dry weather, since stucco needs to cure without rain interrupting the finish. A short seasonal walk-around, checking gutters, joints, and any spot with a history of staining twice a year, catches most problems before they turn into another round of scrubbing.
What Years of Stucco Cleanup Jobs Actually Teach You
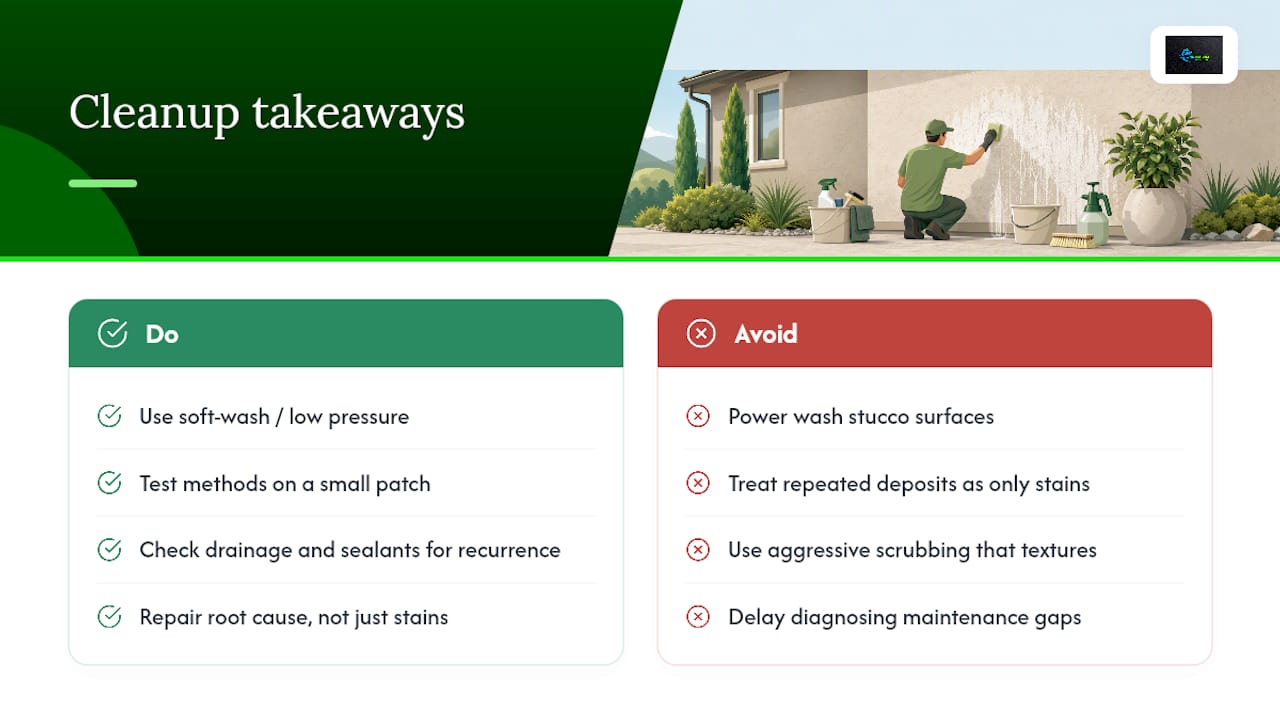
Most efflorescence calls we get start the same way: a homeowner tried to power wash it off, and now there’s a lighter, oddly textured patch where the stain used to be. The fix for over-aggressive cleaning is almost always harder than the fix for efflorescence itself. That’s the pattern worth remembering: soft-wash and low-pressure methods, tested on a small patch first, resolve the vast majority of cases we walk up to.
The recurring cases matter more than the one-off cases. When the same wall keeps showing deposits at the same flashing line, that’s rarely a cleaning problem at all. It’s a maintenance gap somewhere in the drainage or sealant details, and treating it as a stain to scrub away just delays the real repair.
— Bobby
Let a Soft-Wash Professional Handle the Hard Calls
A professional soft-wash service provides a low-pressure alternative to guesswork with acid and a hose. Instead of testing dilution ratios yourself, you can expect an inspection, a test patch on your specific stucco finish, soft-wash cleaning under safe pressure, correct chemical handling with full neutralization, and a post-clean check for any staining or damage.

Booking a professional makes the most sense once efflorescence has come back after a cleaning, covers a large section of wall, or shows up alongside interior dampness or cracking, the exact thresholds covered above. During a soft-wash service, expect a walkthrough of the affected areas, a test patch before any full application, and a rinse and inspection once the work is done. If you’re ready to stop testing dilution ratios yourself, get a free estimate and let a soft-wash crew take the wall from here.
Where This Guidance Comes From
This guidance draws on the SMA efflorescence technical paper, Dryvit’s ReVyvit stucco repair guide, Sto’s cleaning specifications, Behr’s removal instructions, and Inspectapedia’s diagnostic notes. Always confirm exact mixing ratios against your product’s own label before applying anything to stucco.
Sources
- Stucco Manufacturers Association efflorescence technical paper (SMA)
- Dryvit ReVyvit stucco repair guide
- Behr: How to remove efflorescence
- Sto RC100 guideline specifications for cleaning wall surfaces
- Inspectapedia: Efflorescence white deposits
FAQ
Can Efflorescence Be Removed Permanently?
You can remove the visible deposit every time, but it returns permanently unless the underlying moisture source is fixed. Primary efflorescence from new stucco curing usually stops on its own; secondary efflorescence from an ongoing leak keeps coming back until the water path is sealed.
Does CLR Get Rid of Efflorescence?
A calcium, lime, and rust remover like CLR can dissolve light mineral deposits similar to how diluted vinegar or a commercial masonry cleaner works, but it isn’t formulated specifically for stucco. Test it on a hidden patch first and follow the label’s dilution directions before treating a full wall.
What Dissolves Efflorescence?
Water is often enough for light deposits once you’ve dry brushed the surface. Heavier buildup responds to mild detergent, diluted vinegar, or a commercial masonry cleaner, with diluted muriatic acid reserved as the last-resort option for deposits that resist everything else.
Will Vinegar Dissolve Efflorescence?
Yes, vinegar’s mild acidity breaks down the calcium and lime salts that make up most efflorescence. Start around a 1:5 to 1:10 vinegar-to-water ratio, let it sit briefly, agitate with a soft brush, and rinse thoroughly before deciding whether a stronger cleaner is needed.