

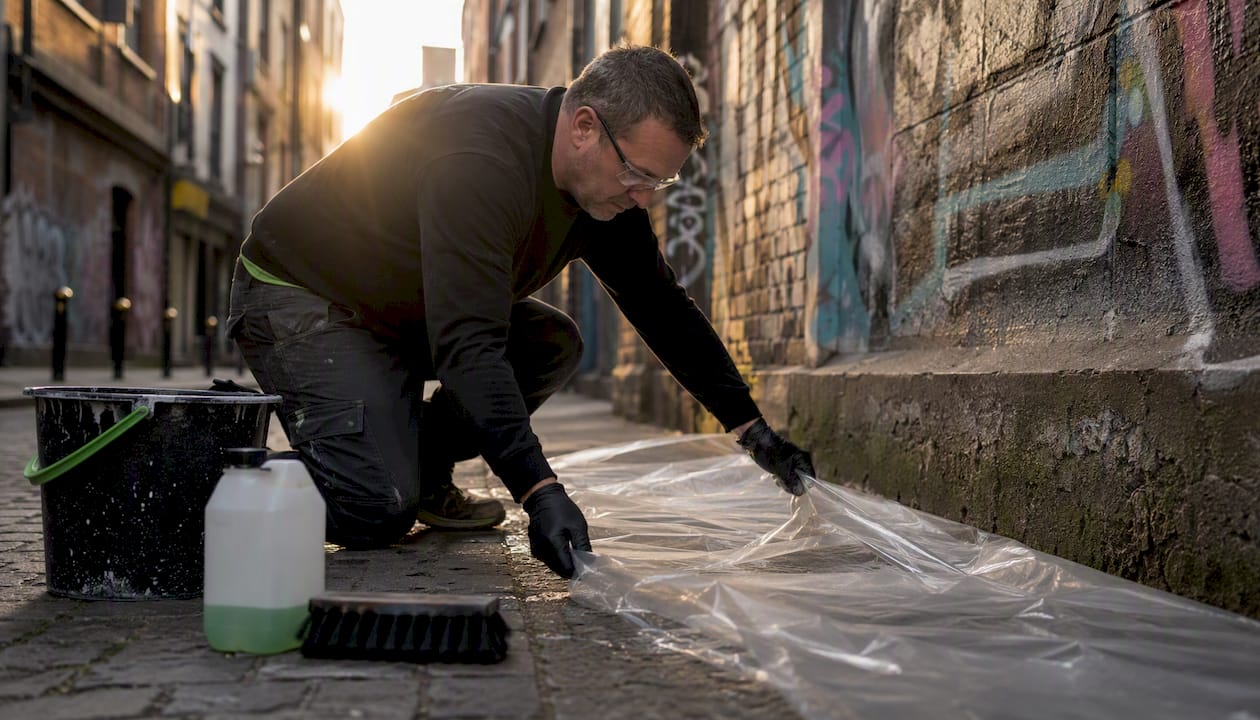
Safe graffiti removal comes down to one rule: match the remover chemistry and mechanical force to both the graffiti medium and the surface porosity. Get that pairing wrong and you risk permanent staining, etched masonry, or stripped coatings that cost far more to fix than the original tag. Before you touch anything, secure your PPE, run a test patch on an inconspicuous area, and reach for a gel-based or low-pressure method first, especially on brick, stucco, or any porous substrate.
Three immediate steps once you find graffiti:
- Gear up: nitrile gloves, safety glasses, and a respirator if you are using solvent-based removers indoors or in low-ventilation areas.
- Test patch: apply your chosen product to a 6"×6" inconspicuous area, note the dwell time, and check for color change or surface damage before scaling up.
- Act fast: municipal guidance consistently shows that removing graffiti within 24–72 hours reduces re-tagging and prevents paint from curing deeper into porous substrates.
Table of Contents
- How to remove graffiti safely: which method fits your situation?
- Surface-by-surface guide to safe graffiti cleaning
- A safe, repeatable removal process you can follow every time
- When DIY makes sense and when to call a professional
- How Whitediamondpressurewashing safely removes graffiti
- How to prevent future graffiti and lower your removal costs
- Key Takeaways
- Why the “just blast it off” instinct costs property owners more than the graffiti did
- Whitediamondpressurewashing handles graffiti removal so you do not have to
- Authoritative references and practical resources
How to remove graffiti safely: which method fits your situation?
The right approach depends on three variables: what the graffiti is made of (spray paint, marker, chalk), how old it is, and what surface it is on. Here is a practical overview of the main categories.
- Gentle solvents and wipes (mineral spirits, turpentine, isopropyl alcohol): best for fresh marker or ink on non-porous surfaces like glass and polished metal. Rubbing alcohol can lift fresh ink but fails on cured spray paint. Low odor risk; minimal runoff concern.
- Commercial gel removers and poultices: gel removers cling to vertical surfaces and maintain dwell time without running off. Poultices draw dissolved pigment into an absorbent paste instead of pushing it deeper into the substrate. Ideal for brick, concrete, and stucco.
- Low-pressure soft washing with detergent: warm water plus a surfactant at controlled pressure removes surface-level paint on painted siding and sealed masonry without abrasion. Preferred by professionals for most residential surfaces.
- Controlled pressure washing: effective on dense, sealed concrete and metal when calibrated correctly. Many off-the-shelf pressure washers exceed safe thresholds for soft or historic masonry, so psi selection matters.
- Abrasive methods (soda blasting, dry-ice blasting): powerful on metal and hard surfaces; too aggressive for brick faces, stucco, or painted wood. Requires professional equipment and containment.
- Laser cleaning: selective and low-impact for specialized conservation work on stone and masonry, but requires certified operators and can alter surface appearance. Reserve for historic preservation projects.
- Household fixes (vinegar, baking soda): vinegar’s mild pH is insufficient for oil-based spray paint on masonry and often smears rather than lifts. These are only worth trying on very fresh, water-based marks on non-porous surfaces.
Pro Tip: Heavy-duty extended-contact strippers can remain active for hours and work well on multilayer or aged graffiti, but they significantly increase containment and disposal demands. Use them only when standard gel removers have already failed.
Surface-by-surface guide to safe graffiti cleaning
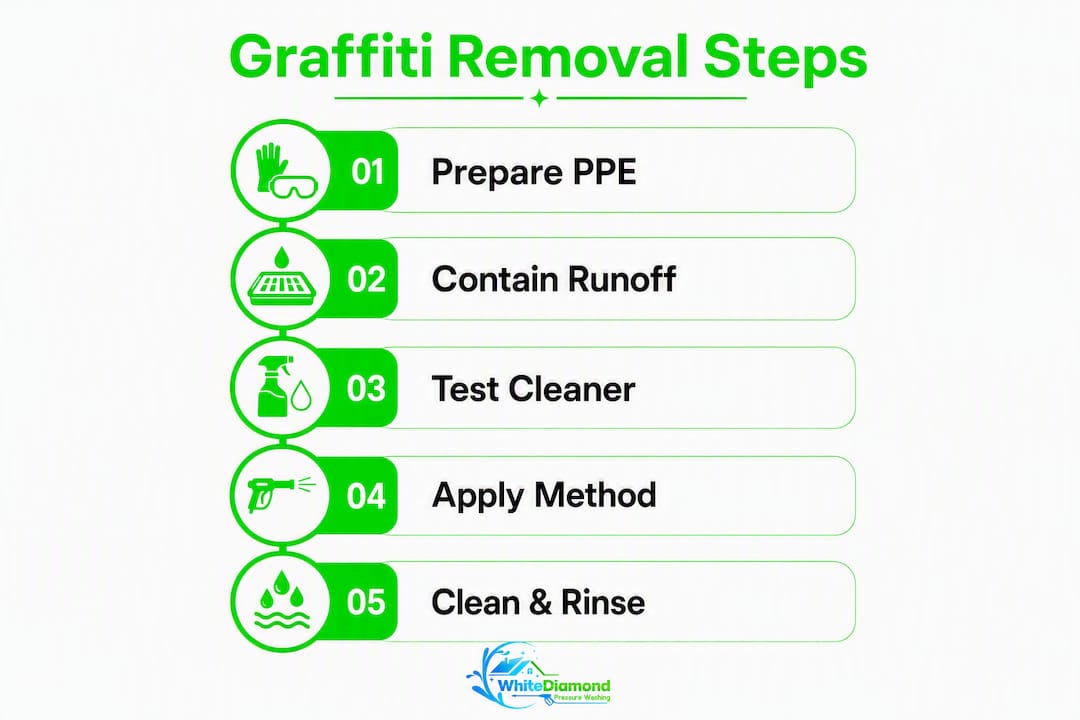
Every surface workflow starts the same way: put on PPE, contain runoff with plastic sheeting or absorbent barriers, and run a 6"×6" test patch with the gentlest plausible method before treating the full area. Record your dwell time and check for ghosting, color shift, or surface texture change.
1. Glass and polished stone
A sharp razor blade held at a flat angle (roughly 30 degrees) removes most spray paint from glass without scratching, provided the blade is fresh. Follow with a mild solvent wipe, isopropyl alcohol or mineral spirits, to clear residue. Risk of substrate damage is low here, but a dull blade drags and scratches. On polished stone, skip the blade entirely and use a pH-neutral gel remover; alkaline cleaners can etch polished surfaces permanently.
2. Metal and painted metal
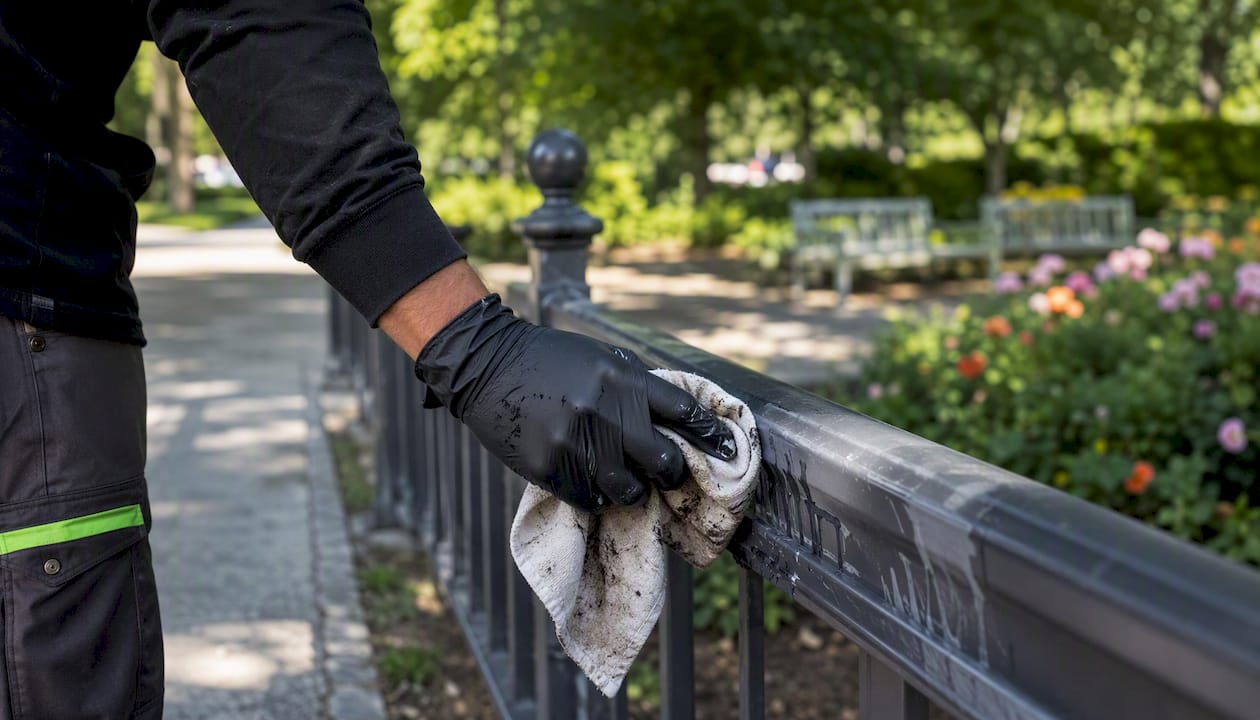
Solvent-based cleaners (mineral spirits, acetone in small amounts) work well on bare metal. On painted metal, test for paint softening before applying anything stronger than mineral spirits. Acetone strips many factory coatings. A light scrub with a non-abrasive pad after solvent application usually clears the tag. Watch for surface corrosion if the metal is already compromised.
3. Painted wood and vinyl siding
This is where DIYers most often cause more damage than the graffiti did. Strong acetone and lacquer thinners strip the underlying paint coat, leaving you with a larger repair job. For painted wood, soft washing with a low-pressure detergent is often the safest first step. If the tag has soaked through, a stain-blocking primer and repaint is frequently the cleanest outcome. On vinyl, acetone can fog or craze the plasticized surface permanently, so stick to commercial graffiti wipes or mild solvent products rated safe for vinyl.
4. Brick, concrete, stucco, and porous masonry
This is the most demanding category. A staged cleaning plan is non-negotiable: start with the gentlest method, escalate only if needed, and keep the area below your working zone wet so dissolved pigment does not absorb into dry pores and create ghosting. Work bottom-up. Apply gel removers or a poultice mixed with an absorbent filler to draw pigment out of the substrate rather than pushing it deeper. Rinse with low pressure. For deep or multilayer tags, a professional chemical-assisted soft-wash approach is almost always the right call.
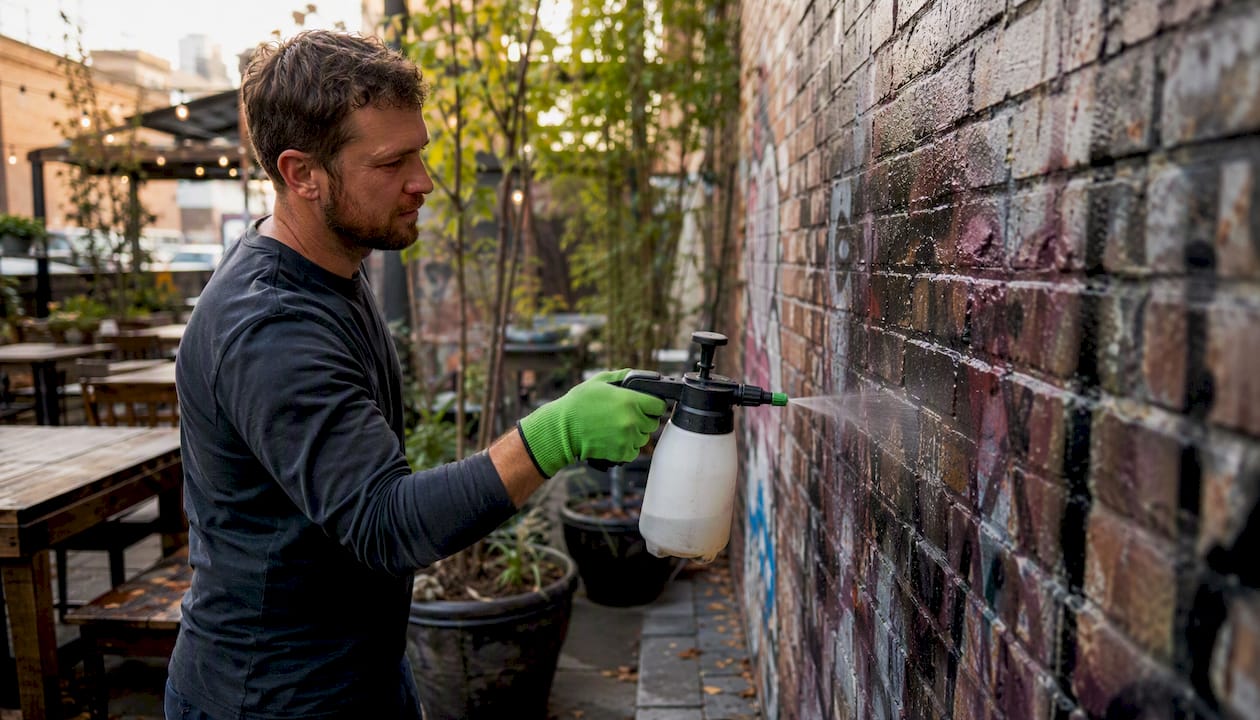
Pro Tip: Pre-wet the masonry below the graffiti before applying any remover. This simple step prevents run-down absorption and is the single most effective way to avoid ghosting on brick and concrete.
5. Vehicles
Auto-grade solvents, a clay bar, or professional detailing are the right tools here. Consumer pressure washers at high psi can strip clear coat and force water into door seams. If the tag is on painted bodywork, a detailing clay bar followed by a light polish removes most spray paint without touching the factory finish. For large coverage, a professional detailer is worth the cost.
A safe, repeatable removal process you can follow every time
This seven-step workflow applies to most exterior surfaces. Adjust dwell times and product choices based on your surface type and the guidance above.
- Prepare the area. Put on nitrile gloves, safety glasses, and a respirator if you are using solvent-based products. Cover nearby plants, vehicles, and drainage inlets with plastic sheeting. Solvents like acetone are flammable and can harm skin and plastics on contact, so containment is not optional.
- Run a test patch. Apply your chosen product to a 6"×6" inconspicuous area. Note the dwell time, check for color change, surface softening, or ghosting. If the surface reacts badly, switch to a gentler method before proceeding.
- Apply the remover. Use a gel or thickened cleaner on vertical or porous surfaces so it stays in contact without running off. Brush or spray evenly and avoid over-saturating.
- Maintain dwell time. Follow the product’s SDS instructions. Do not let the remover dry on the surface; if it starts to dry, mist lightly with water or apply a second thin coat.
- Rinse with low pressure. Professionals use calibrated low-pressure rinsing with adjustable fan tips rather than high-pressure blasting on porous or historic materials. Rinse bottom-to-top, or keep the cleaned area wet, to prevent re-absorption of dissolved pigment. The role of water pressure in this step is often underestimated by DIYers.
- Neutralize if required. Some commercial removers need a neutralizing rinse. Check the product SDS and follow instructions.
- Contain and dispose. Collect solids from paste or poultice systems and follow local hazardous waste disposal rules. Minimize solvent runoff to storm drains and keep it away from vegetation.
When DIY makes sense and when to call a professional
DIY is a reasonable choice when:
- The graffiti is fresh (under 24 hours) and on a non-porous surface like glass or sealed metal.
- The tag is small, on painted siding, and repainting is a straightforward option.
- You have the right PPE, a compatible remover, and time to test properly.
Call a professional when any of these apply:
- The surface is porous masonry, historic brick, stucco, or natural stone.
- The tag covers a large area or involves multiple layers of old paint.
- Environmental containment or local permits are required for solvent disposal.
- The graffiti is on a vehicle, historic facade, or any surface where substrate damage would be costly.
- You have already tried one method and ghosting or discoloration has appeared.
On cost: DIY removal of a small single tag on painted siding typically takes 1–3 hours including prep and cleanup. Professional graffiti removal costs vary significantly by region, surface type, and tag size. For complex porous masonry jobs or large commercial surfaces, knowing which cleaning tasks are worth hiring out often saves money compared to the cost of repairing substrate damage from a failed DIY attempt.
Property managers handling multiple incidents should build a documented vendor relationship for rapid response. Speed matters: the longer graffiti sits, the more it cures into the substrate and the harder and more expensive it becomes to remove cleanly.
How Whitediamondpressurewashing safely removes graffiti
The Whitediamondpressurewashing team starts every graffiti job with a site assessment and surface-specific test panels before any product touches the wall. That is standard operating procedure, not an upsell.
- Test panels first: a small area is treated with the proposed method and evaluated for color change, ghosting, and surface integrity before full application begins.
- Soft washing and low-pressure detergents: for most residential and commercial surfaces, low-pressure soft washing with material-compatible detergents is the preferred first step. It removes surface-level paint without abrading masonry faces or stripping coatings.
- Gel removers and poultices for porous substrates: gel and paste systems are the professional first choice on vertical porous masonry because they preserve dwell time, reduce runoff volume, and minimize the need for aggressive mechanical abrasion.
- No high-pressure blasting on delicate materials: historic brick, stucco, and soft stone stay off the high-pressure list. Controlled fan-tip rinsing at appropriate psi is used instead.
- PPE, ventilation, and containment: the crew follows manufacturer SDS instructions, uses respirators and eye protection, and diverts runoff away from storm drains and vegetation.
- Post-clean protective coating: after successful removal on porous masonry, a penetrating anti-graffiti sealer is recommended to reduce labor and chemical needs if the surface is tagged again.
Pro Tip: Ask any contractor you hire whether they run test panels before full application. If the answer is no, that is a red flag. Substrate damage from skipped testing is rarely covered by insurance and always expensive to fix.
How to prevent future graffiti and lower your removal costs
Removal is reactive. Prevention is where the real savings are.
Sacrificial coatings vs. penetrating sealers
Sacrificial coatings sit on top of the substrate and allow graffiti to be removed with water and mild detergent, then the coating itself is stripped and reapplied. They are easy to use but require periodic reapplication. Penetrating anti-graffiti sealers bond into the substrate and last longer, but future removal still requires compatible chemistry. For high-traffic or frequently targeted surfaces, sacrificial coatings lower per-incident labor costs. For lower-risk surfaces, a penetrating sealer applied once after a clean removal is usually the better investment.
Rapid response policy
Removing graffiti as soon as it appears is the key to its elimination and recurrence prevention. — NPS Preservation Brief 38
A 24–72 hour removal window is the standard municipal recommendation. Fresh paint has not fully cured into the substrate, so removal is faster, cheaper, and less likely to leave ghosting. Photograph the tag first for police reporting, then remove it.
Additional deterrents worth considering:
- Improve lighting around frequently targeted walls and entryways.
- Trim vegetation that provides cover for vandals.
- Apply protective coating to porous masonry after every successful removal.
- Establish a documented vendor relationship so you can respond within hours, not days.
- Register with your municipality’s graffiti reporting program if one exists; some cities offer free or subsidized removal for qualifying properties.
Key Takeaways
Matching remover chemistry and mechanical force to the surface type is the single rule that separates a clean removal from a costly substrate repair.
| Point | Details |
|---|---|
| Test before full application | Always run a 6"×6" patch test and record dwell times before treating the full surface. |
| Match method to surface | Use gel removers and poultices on porous masonry; reserve solvents for non-porous surfaces like glass and metal. |
| Act promptly | Fresh graffiti is easier to remove and less likely to ghost; rapid response also discourages repeat vandalism. |
| Know when to hire a pro | Porous masonry, historic materials, large-area tags, and any job requiring environmental containment call for professional help. |
| Whitediamondpressurewashing | Provides test-panel-first, soft-wash and gel/poultice graffiti removal for residential and commercial properties in Citrus County. |
Why the “just blast it off” instinct costs property owners more than the graffiti did
Most DIY graffiti removal failures follow the same pattern: someone rents a pressure washer, cranks it up, and removes not just the paint but part of the brick face with it. The tag is gone. So is a layer of masonry that took decades to develop its patina. That is not a cleaning outcome; that is a new damage claim.
The conventional wisdom that more pressure equals better cleaning is wrong for porous surfaces. Soft washing with the right chemistry does more work at a fraction of the mechanical force, and it does not leave spalling, etching, or water intrusion paths behind. The same logic applies to solvents: a stronger chemical is not always a better one. Acetone removes spray paint from glass in seconds, but on vinyl siding it fogs the surface permanently.
What actually protects property value is the test-first, escalate-slowly approach that professionals use. It takes longer up front and feels less satisfying than blasting a wall clean in five minutes. But it is the only method that consistently leaves the substrate intact, which is the only outcome that matters when you are managing a property you own or are responsible for.
Historic materials deserve special mention. Once you etch a limestone facade or remove the face of a handmade brick, there is no reversing it. The NPS preservation guidance on this is clear: the goal is to remove the graffiti without harming the surface. That requires patience, the right chemistry, and usually a professional with experience on that specific material type.
Whitediamondpressurewashing handles graffiti removal so you do not have to
Graffiti on a porous wall or commercial facade is not a good DIY project. The chemistry is specific, the pressure calibration matters, and one wrong step can leave you with a substrate repair bill that dwarfs the original cleaning cost.

Whitediamondpressurewashing serves residential and commercial properties across Citrus County and surrounding areas with a process built around protecting your surfaces, not just cleaning them. Every job starts with an on-site assessment and test panels. The crew uses soft washing and low-pressure detergents matched to your specific surface, gel removers and poultices for porous masonry, and responsible containment and disposal throughout. Post-clean protective coatings are available to reduce your costs if the surface gets tagged again.
Services relevant to graffiti removal include exterior wall cleaning, brick and masonry remediation, graffiti protection coating application, and large-area commercial surface treatment.
Get a free estimate and have a professional assess your surface before the paint cures any deeper.
Authoritative references and practical resources
These sources are worth bookmarking for product SDS lookups, municipal reporting programs, and preservation guidance:
- NPS Preservation Brief 38: the definitive federal guide to removing graffiti from historic masonry without substrate damage.
- NPS Preservation Matters: Graffiti Removal: practical maintenance guidance on test panels, chemistry matching, and staged escalation.
- PROSOCO Sure Klean Graffiti Remover: product data sheet covering gel remover application, dwell times, and surface compatibility.
- PROSOCO: Top Graffiti Removers for Concrete and Masonry: overview of professional-grade gel and extended-contact products for heavy or multilayer graffiti.
- GSA / Inspectapedia: Removing Painted Graffiti from Masonry: detailed poultice preparation and application guidance for porous substrates.
- City of Milwaukee Graffiti Removal Techniques: municipal solvent ladder, PPE requirements, and rapid-response rationale.
- USDA Forest Service Graffiti Remover Guide: field-tested guidance on remover selection and environmental considerations for outdoor surfaces.